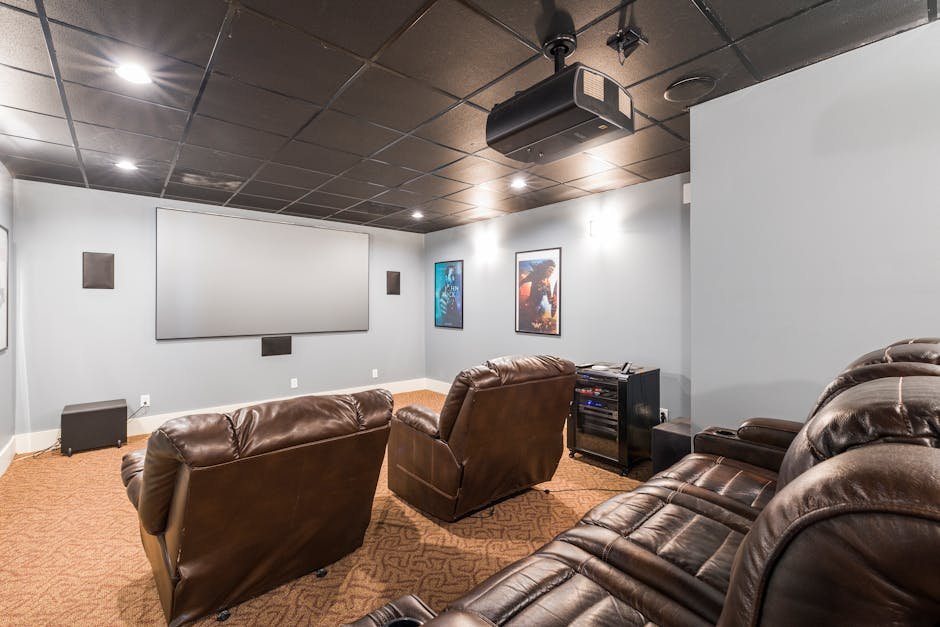
Building a Home Media Server with Plex and Docker
By Alex Torres | March 10, 2026 | Self-Hosted & Media
A complete guide to setting up a Plex media server using Docker Compose, covering hardware requirements, storage planning, hardware transcoding, remote access, performance tuning (see our getting started with Docker), and whether Plex Pass is worth the money.
Why I Chose Plex for My Home Media Server
I have been hoarding digital media for years. Movies ripped from Blu-rays, music albums, home videos, TV show collections — all of it scattered across random hard drives and USB sticks with no coherent way to actually watch any of it. I needed a self-hosted media solution that could organize everything and stream it to every screen in my house. After evaluating the options, I landed on Plex (see our self-hosting Nextcloud), and I have not looked back.
Before I get into the Plex Docker setup, let me briefly address the elephant in the room: why Plex over Jellyfin or Emby?
- Jellyfin is fully open source and completely free, which is admirable. I actually ran it for a few months. But the client apps, especially on smart TVs and mobile devices, still feel rough compared to Plex. Subtitle handling and transcoding reliability gave me headaches. If you are philosophically committed to open source, Jellyfin is a solid choice that keeps getting better, but for polish and ecosystem maturity, it is not there yet.
- Emby sits in a strange middle ground. It used to be open source, then went proprietary. Many of the best features require Emby Premiere (their paid tier). At that point, I would rather pay for Plex Pass and get the more mature app ecosystem.
- Plex wins on client app quality, automatic metadata fetching, Watch Together for remote viewing sessions, and broad device support. The free tier is genuinely usable, and the paid Plex Pass unlocks hardware transcoding and a few other features that make it compelling for power users.
With that settled, let me walk you through my entire Plex media server build, from hardware to a fully working Docker Compose deployment.
Hardware Requirements for a Plex Server
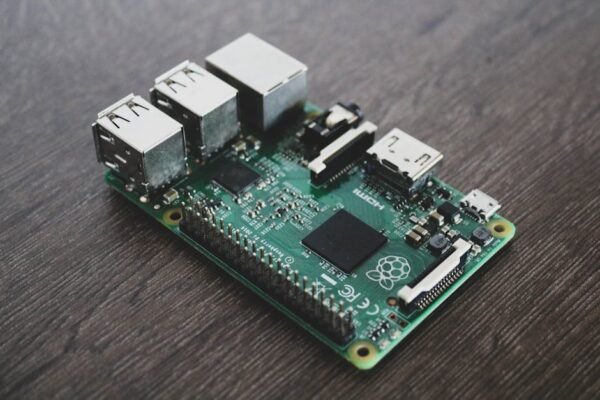
One of the great things about Plex is that it scales to your hardware. You can run it on a Raspberry Pi 4 for direct-play-only setups, or throw it on a beefy workstation if you need to transcode multiple 4K streams simultaneously. Here is what I recommend based on use case.
Minimum (1-2 Users, Mostly Direct Play)
- CPU: Intel Core i3 (8th gen or newer) or AMD Ryzen 3
- RAM: 4 GB (8 GB preferred)
- Storage: At least one dedicated drive for media, separate from the OS drive
- Network: Gigabit Ethernet (do not rely on Wi-Fi for a server)
Recommended (3-5 Users, Transcoding Expected)
- CPU: Intel Core i5 or i7 (10th gen+) with Intel QuickSync, or AMD Ryzen 5 with a dedicated GPU
- RAM: 8-16 GB
- Storage: Multiple drives or a NAS for media, SSD for Plex metadata and the OS
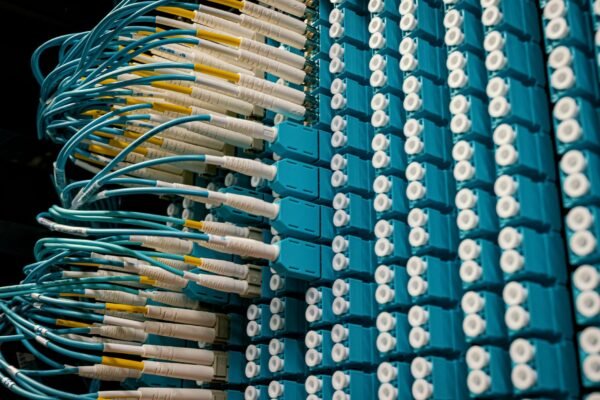
- Network: Gigabit Ethernet, ideally with a managed switch
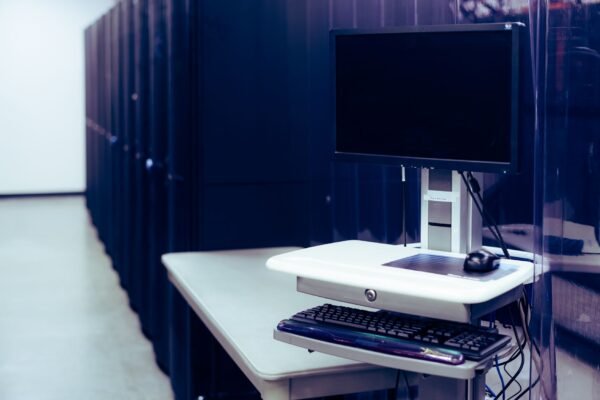
My Build
I am running Plex on an Intel NUC 13 Pro (i7-1360P) with 32 GB of RAM and Ubuntu Server 24.04 LTS. It is overkill for Plex alone, but this machine also runs Pi-hole, a reverse proxy, and a handful of other Docker containers. The i7-1360P has excellent Intel QuickSync support, which means hardware transcoding eats almost no CPU. Media lives on a Synology NAS mounted over NFS. Total idle power draw for the NUC is around 12 watts.
Planning Your Media Storage
Before you touch Docker, you need to think about how your media is organized on disk. Plex is particular about folder structure, and getting this right from the start saves you a lot of pain later.
Recommended Folder Structure
/media/
  movies/
    Movie Title (2024)/
      Movie Title (2024).mkv
    Another Movie (2019)/
      Another Movie (2019).mp4
  tv/
    Show Name (2020)/
      Season 01/
        Show Name - S01E01 - Episode Title.mkv
        Show Name - S01E02 - Episode Title.mkv
      Season 02/
        Show Name - S02E01 - Episode Title.mkv
  music/
    Artist Name/
      Album Name (2023)/
        01 - Track Title.flac
        02 - Track Title.flac
  photos/
    2025/
      2025-06-Vacation/
        IMG_0001.jpg
Key rules to follow:
- One movie per folder. Include the year in parentheses. This helps Plex match metadata correctly.
- TV shows use SxxExx naming. Plex relies on this format to identify seasons and episodes. Inconsistent naming is the number one cause of mismatched metadata.
- Keep each media type on a separate root path. Do not dump movies and TV shows into the same folder. Plex expects you to create separate libraries that point to separate directories.
- Avoid special characters in filenames. Stick to letters, numbers, hyphens, and parentheses.
Storage Sizing
As a rough guide, a 1080p movie averages 5-15 GB depending on encoding. A 4K Blu-ray remux can be 50-80 GB. A full season of a TV show in 1080p runs 10-40 GB. Plan accordingly and think about future growth. I started with 4 TB of media and hit 12 TB within a year. External USB drives work in a pinch, but a proper NAS with RAID or a mergerFS pool is a much better long-term solution.
Docker Compose Setup for Plex
Now for the main event. I run Plex exclusively through Docker because it keeps everything isolated, makes updates trivial, and lets me blow it away and rebuild without affecting the rest of my server. Here is the complete Docker Compose file I use.
Prerequisites
Make sure Docker and Docker Compose are installed. On Ubuntu or Debian:
sudo apt update
sudo apt install -y docker.io docker-compose-v2
sudo systemctl enable --now docker
sudo usermod -aG docker $USER
Log out and back in after adding yourself to the docker group.
Claiming Your Plex Token
Before deploying, grab a claim token from plex.tv/claim. This token links the server to your Plex account during initial setup. It expires after four minutes, so do this right before you bring up the container.
The Docker Compose File
Create a directory for your Plex configuration and the compose file:
mkdir -p ~/docker/plex
cd ~/docker/plex
Create a file called docker-compose.yml with the following contents:
services:
  plex:
    image: lscr.io/linuxserver/plex:latest
    container_name: plex
    network_mode: host
    environment:
      - PUID=1000
      - PGID=1000
      - TZ=America/New_York
      - VERSION=docker
      - PLEX_CLAIM=claim-xxxxxxxxxxxxxxxxxxxx
    volumes:
      - ./config:/config
      - /media/tv:/tv
      - /media/movies:/movies
      - /media/music:/music
      - /media/photos:/photos
      - /tmp/plex-transcode:/transcode
    devices:
      - /dev/dri:/dev/dri
    restart: unless-stopped
Let me break down the key settings:
- image: I use the LinuxServer.io image because it is well-maintained, follows a consistent structure, and has excellent documentation. The official Plex image works too, but the environment variable names differ slightly.
- network_mode: host — Plex works best in host networking mode. It uses DLNA, GDM (for local discovery), and several other protocols that rely on broadcast and multicast traffic. Bridge networking makes local device discovery unreliable.
- PUID/PGID: Set these to your user’s UID and GID so that files created by the container have the correct ownership. Run
idon your host to check your values. - TZ: Your timezone. This ensures logs and scheduled tasks use the correct local time.
- PLEX_CLAIM: Replace this with the token from plex.tv/claim. You only need this on first run.
- volumes: The
/configmount stores Plex metadata, databases, and thumbnails. The media mounts map your host directories into the container. The/transcodemount points to a fast temporary location (I use/tmpon my SSD so transcoding does not hammer my NAS). - devices: /dev/dri — This passes through the Intel GPU for hardware transcoding. I will cover this in detail shortly.
- restart: unless-stopped — The container comes back up automatically after a reboot or a crash, unless you explicitly stop it.
Bringing It Up
docker compose up -dCheck that the container is running:
docker compose logs -f plexYou should see Plex initializing and claiming the server with your account. Once it says the server is ready, open a browser and navigate to http://YOUR_SERVER_IP:32400/web.
Initial Plex Configuration
The first time you open the Plex web interface, you will be guided through a setup wizard. Here is what to pay attention to.
- Server name: Pick something descriptive. I called mine “NUC-Plex” because I am creative like that.
- Allow outside access: You can enable this now or later. I recommend setting it up later after you have verified everything works locally.
- Add libraries: Create separate libraries for Movies, TV Shows, Music, and Photos. Point each one at the corresponding mount path inside the container (
/movies,/tv,/music,/photos). Do not point two libraries at the same folder. - Scanner and agent: For movies and TV shows, use the default Plex Movie and Plex TV Series agents. They pull metadata from TheMovieDB and TheTVDB automatically.
After adding your libraries, Plex will begin scanning and matching your media. This can take a while depending on the size of your collection. Let it finish before you start tweaking settings.
Setting Up Remote Access
One of the best things about running your own Plex media server is being able to stream your content from anywhere. Getting remote access working requires a few steps.
Step 1: Static Internal IP
Make sure your server has a static IP on your local network. Either set it manually in your server’s network configuration or create a DHCP reservation in your router.
Step 2: Port Forwarding
Log into your router and forward TCP port 32400 from your public IP to your server’s internal IP on port 32400. The exact steps vary by router, but it is usually under a section called “Port Forwarding” or “Virtual Servers.”
Step 3: Verify in Plex Settings
Go to Settings > Remote Access in the Plex web interface. If port forwarding is configured correctly, you will see a green checkmark and a message saying the server is fully accessible outside your network. If it shows a warning, double-check your router configuration and make sure your ISP is not using CGNAT (Carrier-Grade NAT). If they are, you may need to call and request a public IP (see our Pi-hole for DNS-level ad blocking), or use a reverse proxy tunnel like Cloudflare Tunnel or Tailscale as a workaround.
Step 4: Secure It
Under Settings > Network, set “Secure connections” to Required. This enforces HTTPS for all remote connections. Plex handles the certificate automatically through their own infrastructure, so you do not need to set up Let’s Encrypt or anything like that.
Hardware Transcoding: Getting the Most from Your Hardware
Transcoding is what happens when a client device cannot direct-play a media file. Maybe the file is encoded in HEVC but the client only supports H.264, or the bitrate is too high for the client’s internet connection. Plex re-encodes the stream in real time, and this is where hardware transcoding becomes essential.
Intel QuickSync (My Recommendation)
If you have an Intel CPU with integrated graphics (most consumer Intel chips from 7th gen onward), you have Intel QuickSync. It is, in my opinion, the best option for Plex hardware transcoding. It is power-efficient, handles multiple simultaneous streams, and produces good quality output.
To enable it in Docker:
- Make sure
/dev/driexists on your host. Runls -la /dev/driand confirm you seerenderD128. - The Docker Compose file above already passes
/dev/driinto the container with thedevicesdirective. - In Plex, go to Settings > Transcoder and check “Use hardware acceleration when available”. This option requires Plex Pass.
- Optionally, check “Use hardware-accelerated video encoding” as well.
To verify it is working, play something that requires transcoding and check docker exec plex nvidia-smi — wait, wrong GPU. For Intel, run:
sudo apt install intel-gpu-tools
sudo intel_gpu_top
You should see the video engine light up when a transcode is in progress. You can also check the Plex dashboard: an active stream will say “(hw)” next to the transcode indicator if hardware acceleration is engaged.
NVIDIA GPU Transcoding
If you have a dedicated NVIDIA GPU, Plex can use NVENC/NVDEC for hardware transcoding. This is especially useful if your CPU lacks integrated graphics (like AMD desktop chips without a G suffix). The setup involves a few extra steps:
- Install the NVIDIA drivers on your host.
- Install the NVIDIA Container Toolkit so Docker can access the GPU:
distribution=$(. /etc/os-release;echo $ID$VERSION_ID)
curl -fsSL https://nvidia.github.io/libnvidia-container/gpgkey | sudo gpg --dearmor -o /usr/share/keyrings/nvidia-container-toolkit-keyring.gpg
curl -s -L https://nvidia.github.io/libnvidia-container/$distribution/libnvidia-container.list | \
  sed 's#deb https://#deb [signed-by=/usr/share/keyrings/nvidia-container-toolkit-keyring.gpg] https://#g' | \
  sudo tee /etc/apt/sources.list.d/nvidia-container-toolkit.list
sudo apt update
sudo apt install -y nvidia-container-toolkit
sudo nvidia-ctk runtime configure --runtime=docker
sudo systemctl restart docker
Then modify the Docker Compose file. Replace the devices section with a deploy block:
services:
  plex:
    image: lscr.io/linuxserver/plex:latest
    container_name: plex
    network_mode: host
    environment:
      - PUID=1000
      - PGID=1000
      - TZ=America/New_York
      - VERSION=docker
      - NVIDIA_VISIBLE_DEVICES=all
      - NVIDIA_DRIVER_CAPABILITIES=compute,video,utility
    volumes:
      - ./config:/config
      - /media/tv:/tv
      - /media/movies:/movies
      - /media/music:/music
      - /tmp/plex-transcode:/transcode
    runtime: nvidia
    restart: unless-stopped
Note the addition of the NVIDIA environment variables and the runtime: nvidia line. After restarting the container, enable hardware transcoding in Plex settings just like the Intel method. Verify with nvidia-smi on the host — you should see the plex process using the GPU during active transcodes.
A Note on Transcoding Quality
Hardware transcoding trades some visual quality for speed and efficiency. For most content, the difference is negligible. If you are a videophile who notices compression artifacts at normal viewing distances, you can increase the transcoding quality in Settings > Transcoder > Transcoder quality to “Make my CPU hurt” — yes, that is the actual label Plex uses. But for the vast majority of users, the default setting with hardware acceleration is the sweet spot.
Plex on All Your Devices
Part of what makes Plex so compelling is the breadth of its client ecosystem. Here is a quick rundown of where you can watch:
- Smart TVs: Native apps available on Samsung (Tizen), LG (webOS), Sony and other Android TV / Google TV sets. In my experience, the Android TV app is the most polished.
- Streaming devices: Apple TV, Roku, Amazon Fire TV, Chromecast with Google TV, NVIDIA Shield. The Shield is often called the gold standard Plex client because it can direct-play virtually anything.
- Mobile: iOS and Android apps. They require a one-time unlock fee or Plex Pass to play videos longer than one minute (audio is free). This is one of the few restrictions on the free tier.
- Web browser: The Plex web app at app.plex.tv or your server’s local address. Fully functional, no installation needed.
- Desktop: Plex has a desktop app called Plex HTPC for Windows, macOS, and Linux. There is also Plexamp, their dedicated music player, which is genuinely excellent if you have a music library.
- Game consoles: PlayStation 4/5 and Xbox One/Series consoles all have Plex apps.
My advice: wherever possible, use a client that supports direct play for your most common file formats (typically H.264 and H.265 in MKV or MP4 containers). This eliminates transcoding entirely and gives you the best quality with the least server load.
Performance Tuning Tips
Once your Plex media server is up and running, these tweaks will make it faster and more reliable.
Move Metadata to an SSD
Plex stores thumbnails, artwork, and its SQLite database in the config directory. If this is on a spinning hard drive, browsing your library will feel sluggish. Make sure the ./config volume mount in your Docker Compose file lives on an SSD. The metadata database can grow to several gigabytes for large libraries, and random I/O performance matters.
Use a RAM Disk or SSD for Transcoding
The /transcode directory receives heavy random writes during transcoding. Pointing it at /tmp (which is often a tmpfs on modern Linux distros) or a dedicated SSD partition avoids wearing out a hard drive and speeds up the process. Do not use a NAS path for this.
Scheduled Library Scans
By default, Plex periodically scans your library for new content. If you add media frequently, you can set up more frequent scans or use tools like Sonarr and Radarr that notify Plex immediately when new content arrives. Under Settings > Library, you can also enable “Scan my library automatically” which uses filesystem change notifications (inotify) when supported.
Optimize Database
Every few months, I manually optimize the Plex database. You can trigger this from Settings > Troubleshooting > Optimize Database. It cleans up orphaned entries and can improve browsing performance, especially after deleting a large number of media files.
Limit Remote Streaming Quality
Under Settings > Remote Access, you can set a maximum bitrate for remote streams. If your upload bandwidth is limited (say, 20 Mbps), capping remote streams to 8 Mbps per user ensures that two or three simultaneous remote viewers do not saturate your upload and degrade the experience for everyone.
Is Plex Pass Worth It?
This is the question I get asked the most. Plex Pass comes in three tiers: monthly ($4.99/month), yearly ($39.99/year), or a lifetime purchase ($119.99 one-time). Here is what you get with Plex Pass that you do not get on the free tier:
- Hardware-accelerated transcoding — Without Plex Pass, all transcoding is software-only, which hammers your CPU. This alone justifies the cost for most people running a home media server.
- Mobile app unlock — Without Plex Pass, the iOS and Android apps restrict video playback to one-minute previews.
- Skip Intro / Skip Credits — Automatically detects and offers to skip intros on TV shows. Small feature, but addictive once you have it.
- Lyrics support — Plexamp shows synchronized lyrics for songs.
- Live TV and DVR — If you have an HDHomeRun or compatible tuner, Plex Pass lets you watch and record live TV.
- Multi-user management — Plex Home lets you create managed users with parental controls and separate watch histories.
My verdict: yes, Plex Pass is worth it, especially the lifetime option. Hardware transcoding alone saves you from needing a beefier CPU. The mobile app unlock removes a genuinely annoying restriction. And the one-time lifetime price pays for itself compared to the monthly plan within two years. If you are committed enough to be running Plex on Docker on your own server, you are committed enough to benefit from Plex Pass.
Wrapping Up
Building a home media server with Plex and Docker is one of those projects that pays dividends every single day. Once it is set up, you have a Netflix-like experience for your own media collection, accessible from every device in your house and anywhere in the world. The Docker Compose approach makes maintenance dead simple: updating is a matter of pulling the latest image and restarting the container, and your configuration and media remain untouched.
If you followed this Plex tutorial from start to finish, you should now have a working Plex Docker setup with organized media libraries, hardware transcoding enabled, remote access configured, and a solid understanding of how to keep it running smoothly. If you have questions or want to share your own Plex server build, drop a comment below or reach out on the IGNA Online community forums.
Happy streaming.
Leave a Reply