
Why Immich Has Become the Default Google Photos Alternative
Self-hosted photo management has come a long way. For years the options were clunky, slow, or missing features that made cloud alternatives hard to abandon. Immich changed that. It’s a self-hosted photo and video library with a mobile app that replicates the Google Photos experience almost beat for beat—automatic backup, face recognition, album sharing, timeline view, and a search that actually works. The difference is that your data lives on hardware you control.
If you’ve been paying for Google One storage, or you’re sitting on years of phone camera rolls with no good organizational system, this guide will walk you through a complete Immich deployment on Docker. By the end you’ll have automatic phone backups, machine-learning powered search and face grouping, and a web interface that doesn’t feel like 2009.
This tutorial assumes you have Docker and Docker Compose v2 installed. If not, get those squared away with our complete Docker beginner’s guide before continuing.
What Immich Actually Does
Immich is not a simple file server with a photo viewer bolted on. It runs several services working together:
- immich-server: The main API and web interface
- immich-machine-learning: Handles face detection, face recognition, CLIP-based smart search, and object detection
- PostgreSQL (with pgvecto.rs extension): Stores metadata, face embeddings, and search vectors
- Redis: Job queue and cache layer
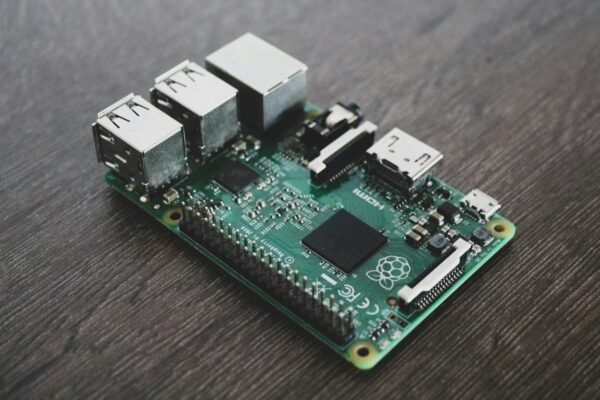
The machine learning container is optional but makes the product significantly more useful. On a modern CPU it runs acceptably; on a machine with a GPU or NPU it’s noticeably faster. A Raspberry Pi 5 can handle the ML workload for a single household.
Hardware and Storage Planning
Before you deploy, plan your storage. Immich stores original files and never re-encodes or compresses your photos. For a typical family photo library:
- 20,000 photos at ~5MB average = ~100GB for originals
- Thumbnails and previews add roughly 20-30% overhead
- ML models download on first run (~2GB total)
Use a separate drive or NAS mount for the photo data rather than your system drive. Immich is configured with a single UPLOAD_LOCATION environment variable pointing to that path—easy to point at a mounted NAS share, an additional disk, or a ZFS dataset.
RAM: 4GB minimum for the full stack. 8GB is comfortable. The ML container uses 2-4GB alone when actively processing.
Step 1: Create the Directory Structure
mkdir -p ~/immich/{postgres,model-cache}
mkdir -p /mnt/photos  # or wherever your photo storage lives
cd ~/immich
Step 2: Create the Environment File
Immich uses a .env file to centralize all configuration. Create ~/immich/.env:
# Photo storage location - use your actual storage path
UPLOAD_LOCATION=/mnt/photos

# Database config
DB_DATA_LOCATION=./postgres
DB_PASSWORD=change_this_to_a_strong_password
DB_USERNAME=immich
DB_DATABASE_NAME=immich

# Required for pgvecto.rs
DB_VECTOR_EXTENSION=pgvecto.rs

# Redis (leave as-is for local Redis)
REDIS_HOSTNAME=immich_redis

# Immich version - always pin to a specific release
IMMICH_VERSION=release
Change DB_PASSWORD to something strong. Everything else can stay as-is for a basic install.
Step 3: Write the Docker Compose File
Create ~/immich/docker-compose.yml. Immich maintains an official Compose file—use it as your base rather than writing one from scratch, as it’s kept in sync with version changes:
name: immich

services:
  immich-server:
    container_name: immich_server
    image: ghcr.io/immich-app/immich-server:${IMMICH_VERSION:-release}
    volumes:
      - ${UPLOAD_LOCATION}:/usr/src/app/upload
      - /etc/localtime:/etc/localtime:ro
    env_file:
      - .env
    ports:
      - "2283:2283"
    depends_on:
      - redis
      - database
    restart: always
    healthcheck:
      disable: false

  immich-machine-learning:
    container_name: immich_machine_learning
    image: ghcr.io/immich-app/immich-machine-learning:${IMMICH_VERSION:-release}
    volumes:
      - ./model-cache:/cache
    env_file:
      - .env
    restart: always
    healthcheck:
      disable: false

  redis:
    container_name: immich_redis
    image: docker.io/redis:6.2-alpine
    healthcheck:
      test: redis-cli ping
      interval: 30s
      timeout: 30s
      retries: 3
    restart: always

  database:
    container_name: immich_postgres
    image: docker.io/tensorchord/pgvecto-rs:pg14-v0.2.0
    environment:
      POSTGRES_PASSWORD: ${DB_PASSWORD}
      POSTGRES_USER: ${DB_USERNAME}
      POSTGRES_DB: ${DB_DATABASE_NAME}
      POSTGRES_INITDB_ARGS: '--data-checksums'
    volumes:
      - ${DB_DATA_LOCATION}:/var/lib/postgresql/data
    healthcheck:
      test: pg_isready --dbname='${DB_DATABASE_NAME}' --username='${DB_USERNAME}' || exit 1
      interval: 5m
      start_interval: 30s
      start_period: 5m
    command: >
      postgres
      -c shared_preload_libraries=vectors.so
      -c 'search_path="$$user", public, vectors'
      -c logging_collector=on
      -c max_wal_size=2GB
      -c shared_buffers=512MB
      -c wal_compression=lz4
    restart: always
Port 2283 is Immich’s default. You can put it behind a reverse proxy later to get a clean domain with HTTPS—or expose it via Tailscale without any port forwarding at all.
Step 4: Start the Stack
cd ~/immich
docker compose up -d
docker compose logs -f immich-server
The first run takes several minutes. The ML container downloads models on startup—watch its log separately with docker compose logs -f immich-machine-learning if you want to track that. Once everything is stable:
docker compose ps
All four services should show as healthy. Browse to http://your-server-ip:2283 and you’ll see the Immich setup wizard.
Step 5: Initial Configuration
The setup wizard creates your admin account. After logging in, visit Administration → System Settings and configure a few things right away:
- Machine Learning URL: Should default to
http://immich-machine-learning:3003. If the ML container isn’t running, disable ML here entirely. - Storage Template: Controls how Immich names files on disk. The default uses a date-based hierarchy which is sensible. Custom templates like
YYYY/MM/DD/filenamemake the storage more navigable if you ever access files directly. - Trash: Enable this under General settings. Without it, deleting a photo in the UI permanently removes the file immediately—no recovery window.
- Database Backup: Enable the nightly database backup job under Administration → Jobs. It dumps the Postgres database to
UPLOAD_LOCATION/backups/automatically.
Step 6: Mobile App Setup and Backup
Immich has first-party iOS and Android apps. After installing either:
- Enter your server URL (
http://your-server-ip:2283or your domain if you’ve set up a reverse proxy) - Log in with your credentials
- Go to Profile → Backup → Auto Backup and enable it
The initial upload of a large library will take hours—let it run on WiFi overnight. Immich handles interruptions gracefully and resumes where it left off. Once the backlog is cleared, new photos sync within minutes of being taken.
For multiple users, create separate accounts under Administration. Each person gets their own private library, and albums can be selectively shared between accounts. There’s also a Shared Library feature for pooling photos that belong to the household rather than any one person.
GPU Acceleration for Machine Learning (Optional)
If your host has an NVIDIA GPU, enabling hardware acceleration dramatically speeds up face recognition and smart search indexing. Add this to the immich-machine-learning service:
  immich-machine-learning:
    # ... existing config ...
    deploy:
      resources:
        reservations:
          devices:
            - driver: nvidia
              count: 1
              capabilities: [gpu]
    environment:
      - MACHINE_LEARNING_DEVICE=cuda
This requires the NVIDIA Container Toolkit on the host (nvidia-container-toolkit package). For Intel integrated graphics, set MACHINE_LEARNING_DEVICE=openvino—Immich handles the OpenVINO runtime internally with no other changes required.
Without GPU acceleration, face indexing for 20,000 photos takes several hours on a modern CPU. With a mid-range GPU it takes 15-30 minutes. For an initial library this is a one-time cost either way, so the tradeoff depends on whether you want the setup hassle now or the wait later.
Accessing Immich Remotely
Port 2283 on HTTP works fine for LAN access. For remote access, you have two main options:
Tailscale (easiest): If you already use Tailscale to connect your devices, enable Tailscale’s Magic DNS and HTTPS certificates on your tailnet. Point the Immich mobile app at https://your-machine.your-tailnet.ts.net:2283 and you get end-to-end encrypted access with a valid certificate and zero port forwarding. This is the right approach for most homelab setups.
Reverse proxy with public domain: If you want to share access with people outside your tailnet (family members, partners), put Immich behind a reverse proxy with a public subdomain. Immich works as a standard HTTP backend on port 2283—it’s compatible with any standard reverse proxy setup.
Backup Strategy
Immich stores originals at UPLOAD_LOCATION in a structured folder hierarchy. This path is your source of truth—back it up like anything irreplaceable:
- Local backup: Nightly restic or rsync snapshot of
UPLOAD_LOCATIONto a second drive or NAS volume - Offsite backup: Rclone or restic to B2, Wasabi, or another S3-compatible bucket, encrypted before upload
- Database backup: Enable Immich’s built-in nightly dump (it goes into
UPLOAD_LOCATION/backups/, so it’s covered by the file-level backup automatically)
Do not rely on Immich’s trash or the Postgres container volume as your backup. Photos are irreplaceable; the storage should be treated accordingly.
Importing an Existing Photo Library
If you have years of photos already organized on disk, Immich’s External Library feature lets you point it at an existing folder without copying or re-organizing anything. This is the right approach when your library is already on a NAS in a structure you want to keep—you don’t want Immich duplicating 500GB into its own upload folder.
To set it up, go to Administration → External Libraries → Create Library and specify the path inside the container. You’ll need to add that path as a volume mount in your Compose file:
  immich-server:
    volumes:
      - ${UPLOAD_LOCATION}:/usr/src/app/upload
      - /mnt/nas/photos:/mnt/nas/photos:ro  # read-only mount of existing library
      - /etc/localtime:/etc/localtime:ro
The :ro flag is important—Immich shouldn’t be writing to your existing library structure. After adding the volume and restarting, configure the external library path to /mnt/nas/photos and trigger an initial scan. Immich will index everything without moving a single file.
External libraries aren’t synced from mobile—they’re read-only references. But they let you see your entire photo history in Immich’s timeline and smart search while keeping the originals exactly where they are.
Key Features Worth Knowing
Once your library is imported and the ML indexing finishes, several features become genuinely useful:
Smart Search: Powered by CLIP embeddings, you can search for concepts rather than filenames. Queries like “sunset on the beach” or “birthday cake” find relevant photos even if those words appear nowhere in the metadata. This is the feature that makes Google Photos hard to leave—Immich matches it well once ML is indexed.
Face Recognition and People: Immich detects faces across your library and clusters them. You name the clusters and from then on you can browse or search by person. Performance varies with image quality—well-lit face-forward shots get clustered reliably; side profiles and partial faces sometimes don’t. The model improves as you confirm and merge clusters through the People interface.
Memories: A “On This Day” feature surfaces photos from the same calendar date in previous years. It’s the one Google Photos feature people actually miss when switching—Immich has it.
Albums and Sharing: Create albums and share them via link (public, no account required) or with specific Immich users. Shared links can have optional passwords and expiration dates. Partners can share their entire library with you for a merged timeline view.
Map View: If your photos have GPS EXIF data, the map view shows where they were taken. Works offline—no tile CDN required; Immich bundles its own map tiles.
Stacks: Group burst shots or RAW+JPEG pairs into a stack so only the best photo shows in the timeline. The others remain accessible but don’t clutter the main view.
Keeping Immich Updated
Immich releases frequently and the update process is straightforward:
cd ~/immich
docker compose pull
docker compose up -d
Always check the release notes before updating—Immich occasionally has breaking database migrations that require attention. Never skip multiple major versions; update incrementally if you’ve let it fall behind. To pin a specific version, change IMMICH_VERSION=release in your .env to a version tag like v1.115.0.
Troubleshooting Common Issues
- Photos stuck in “Queued” status: The ML container is still downloading models or processing a backlog. Check
docker compose logs immich_machine_learningand wait—large libraries can take hours on first index. - Database fails to start with extension errors: Verify you’re using
tensorchord/pgvecto-rs, not plain Postgres. The vector extension is required and isn’t available in standard Postgres images. - Mobile app can’t reach server: Make sure the URL has no trailing slash, and that port 2283 is reachable from the phone’s network. Test with curl from the phone’s local network first before suspecting the app.
- Face recognition not running on old photos: Trigger a manual run under Administration → Jobs → Detect Faces. New photos process automatically, but the initial library scan must be kicked off manually.
- High disk usage in postgres volume: Run
docker compose exec database psql -U immich -c "VACUUM ANALYZE;"to reclaim space after large bulk deletions.
Wrapping Up
Immich has matured to the point where it’s genuinely better than most cloud photo services for people who care about control, storage costs, and privacy. The Docker deployment is well-documented, actively maintained, and requires minimal ongoing attention once it’s running.
The one non-negotiable: Immich is your photo library, not your backup. Set up at least two independent copies of UPLOAD_LOCATION, one of which is offsite. Pair Immich with Uptime Kuma to alert you if the server goes down and mobile backup silently stops working.
If you’re building out a broader self-hosting stack, the Nextcloud guide covers document and file sync on the same infrastructure—a natural companion to Immich for keeping your entire digital life off third-party clouds.