Overlanding 101: How to Set Up Your Jeep for Multi-Day Trail Adventures
Alright, let me just say it: overlanding changed my life. I know that sounds dramatic, but hear me out. A few years ago I was the guy who would wheel hard on Saturday, come home sunburned and sore, and crash on the couch. Fun? Absolutely. But then I discovered the magic of packing up my Jeep, hitting the trail, and just… staying out there. Multiple days, no cell service, coffee brewed on a camp stove while watching the sun come up over a ridgeline. That is overlanding, and once you try it, day trips will never feel the same.
If you have been thinking about setting up your Jeep for multi-day trail adventures, you are in the right place. I have spent the last several years dialing in my overlanding setup, made plenty of expensive mistakes along the way, and I want to help you skip the learning curve. This guide covers everything from choosing the right Jeep platform to the recovery gear that could save your trip (or your life). Let us get into it.
What Is Overlanding, Exactly?
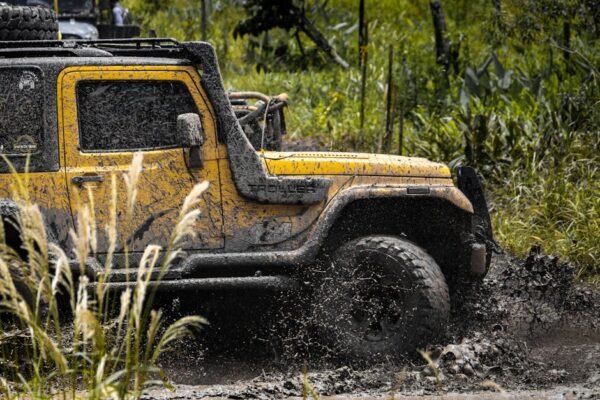
Before we start bolting things on, let us make sure we are on the same page. Overlanding is vehicle-dependent travel where the journey is the destination. It is not rock crawling (though you might do some). It is not car camping in a parking lot (though you will camp). Overlanding sits right at the intersection of off-roading and backcountry camping. You are using your Jeep to access remote places, carrying everything you need to be self-sufficient for days at a time.
Think of it this way: if your goal is to conquer a specific obstacle, that is wheeling. If your goal is to travel through wild country, sleep under the stars, and wake up to do it again tomorrow, that is overlanding. And a Jeep Wrangler is one of the absolute best platforms to do it on.
Choosing the Right Jeep Platform for Overlanding
Not all Jeeps are created equal when it comes to overlanding setup, and the “best” one depends on your budget and priorities. Here is my honest take on the three most popular Wrangler generations for this kind of use.
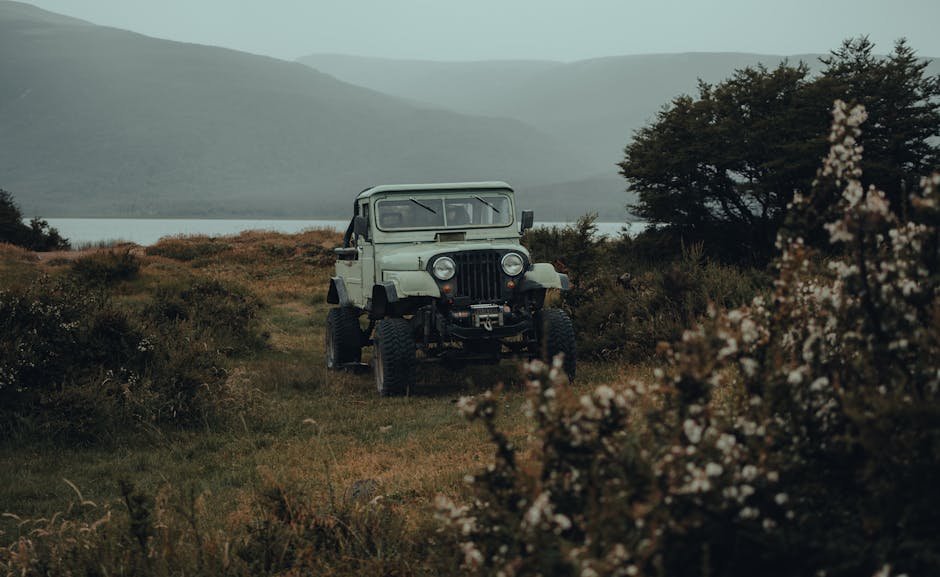
TJ Wrangler (1997-2006)
The TJ is the budget king. You can find solid examples for a fraction of what a JL costs, and the 4.0L inline-six is one of the most bulletproof engines ever put in a vehicle. The downside? It is small. Seriously small. Packing for multi-day trips in a two-door TJ is like playing Tetris on hard mode. If you go this route, plan on a roof rack and possibly a small trailer. The coil-spring suspension is a huge upgrade over the older YJ leaf springs and takes well to a moderate lift. For a first-time overlander on a tight budget, a clean TJ with the 4.0 is hard to beat.
JK Wrangler (2007-2018)
The JK, especially the four-door Unlimited, is the sweet spot for Jeep overlanding right now. Prices have come down since the JL launched, you get more interior space, better on-road manners, and a huge aftermarket. The 3.6L Pentastar V6 (2012+) is a reliable and reasonably powerful engine. The earlier 3.8L is fine but feels underpowered when loaded with gear. If I were building a dedicated overlander on a mid-range budget in September 2025, I would be shopping for a 2012-2018 JKU without hesitation.
JL Wrangler (2018-Present)
The JL is the newest and most refined Wrangler. It rides better, has modern tech, improved safety, and the interior does not feel like you are sitting inside a tin can. The 2.0L turbo four-cylinder actually gets decent fuel economy (a real consideration when you are covering hundreds of trail miles). The Rubicon trim comes with lockers, disconnecting sway bar, and 4:1 transfer case from the factory, which saves you a fortune in mods. The catch? JLs are still pricey, and some folks feel they are over-engineered for trail use. But if your budget allows, a JL Rubicon is a phenomenal overlanding platform right out of the box.
Essential Mods for Your Jeep Overlanding Build
Here is where things get fun (and where your wallet starts to sweat). You do not need to do everything at once. In fact, I recommend building in stages. But these are the modifications that make the biggest difference for multi-day trail adventures.
Suspension Lift
A lift is about more than looks. For overlanding, you want ground clearance to handle rocky trails and enough suspension travel to keep all four tires on the ground over uneven terrain. I recommend a 2.5-inch to 3.5-inch lift for most overlanding builds. Go too high and you compromise on-road stability, which matters when you are driving hundreds of highway miles to reach the trailhead.
Solid options I have run or trust:
- AEV DualSport Suspension — My top pick. Designed specifically for loaded Jeeps. The ride quality on and off road is outstanding.
- Old Man Emu (OME) by ARB — A classic overlanding choice. They tune their springs for loaded weight, not just an empty Jeep in a parking lot.
- Metalcloak Game Changer — Excellent value with their RockSport springs and long-travel design.
- Fox 2.0 Performance Series Shocks — If you are mixing and matching components, these shocks are hard to beat for the price.
Tires
Tires are arguably the single most important upgrade. For overlanding, you want an all-terrain or a mild mud-terrain that can handle rocky trails, dirt roads, and mud without being miserable on highway drives. I run 33-inch or 35-inch tires depending on the Jeep, and I strongly recommend you size up from stock.
- BFGoodrich KO2 — The industry standard all-terrain. Tough sidewalls, great tread life, predictable in every condition.
- Falken Wildpeak AT3W — Fantastic value. Surprisingly capable off-road and very comfortable on the highway.
- Toyo Open Country AT III — Another excellent all-rounder with strong wet-weather performance.
- Nitto Ridge Grappler — A hybrid tire that leans toward the mud-terrain side. Great if your trails tend to be gnarlier.
Bumpers and Armor
Stock bumpers are flimsy and limit your approach and departure angles. A steel front bumper gives you a place to mount a winch (more on that shortly) and protects your investment when you misjudge a line. Rock sliders protect your rocker panels and double as a step, which is clutch when you are loading a rooftop tent. I like the ARB Summit bumper for its integrated winch mount and fog light provisions, and EVO Manufacturing rock sliders for their burly construction and clean look.
Do not forget skid plates. At minimum, protect your oil pan, transmission, and transfer case. RCI Metalworks makes excellent full skid plate systems, and Artec Industries makes some of the toughest belly armor you can buy.
Camping and Sleeping Setup: Rooftop Tent vs. Ground
This is the single most debated topic in overlanding, and honestly, there is no wrong answer. I have done both extensively, and here is my take.
Rooftop Tent
A rooftop tent on a Jeep is the most convenient sleeping setup for overlanding. You pull into camp, unlatch the tent, unfold it, and you are in bed in under two minutes. No searching for flat ground, no worrying about puddles or critters, and you get a real mattress built into the tent. For multi-day trips where you are setting up and breaking down camp every day, this convenience is a game changer.
Rooftop tent recommendations:
- iKamper Skycamp 3.0 — The gold standard. Hard shell, quick setup, sleeps two adults comfortably with room to spare. Not cheap, but worth every penny.
- Roofnest Sparrow — A more budget-friendly hard-shell option that is well-built and reliable.
- Smittybilt Overlander — The entry-level pick. A soft-shell tent that gets the job done without breaking the bank. Great for figuring out if rooftop camping is for you.
You will need a solid roof rack to support the tent. I run the Rhino-Rack Pioneer Platform, and the Front Runner Slimline II is another excellent choice. Make sure your rack is rated for the static weight of the tent plus occupants.
Ground Tent
Ground tents are lighter, cheaper, and do not affect your center of gravity or fuel economy. If you are on a budget or plan on doing serious rock crawling during the day (where a rooftop tent adds unwanted height and weight), a quality ground tent makes total sense. I keep a REI Half Dome as my backup setup. It packs small and sets up fast.
Water, Food, and Cooking on the Trail
This section does not get enough love in most overlanding guides, but it is honestly the difference between an epic trip and a miserable one. You need to eat well and stay hydrated, especially at elevation and in hot weather.
Water
Plan for a minimum of one gallon per person per day, more in the desert. I carry water in a combination of:
- Scepter military water cans (MWCs) — Stackable, durable, and available in multiple sizes. I carry two 5-gallon cans.
- Front Runner water tank — Mounts under the Jeep or on a rack. Great for a semi-permanent setup.
- Sawyer Squeeze water filter — Essential backup. If you are near a stream or lake, you can filter water on the go.
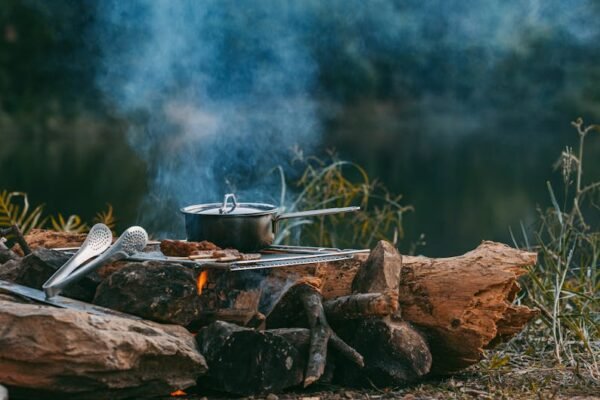
Cooking
You do not need a full kitchen, but a good stove makes a world of difference. Here is my current cooking setup:
- Partner Steel 2-burner stove — A beast. Wind-resistant, adjustable flame, practically indestructible. It has made thousands of trail meals across the overlanding community.
- GSI Outdoors Pinnacle Camper cookset — Nests together for compact storage. Includes pots, pans, plates, and cups for four people.
- Dometic CFX3 45 cooler/fridge — This is a luxury item but once you have one, you cannot go back. A 12V compressor fridge keeps your food cold for the entire trip. No more soggy ice-chest sandwiches. I run mine off a secondary battery.
For food, keep it simple: pre-made burritos wrapped in foil (heat them on the stove in the morning), pasta with jarred sauce, canned chili, oatmeal, jerky, trail mix, and fresh fruit for the first couple of days. You are not trying to win a cooking show — you are trying to fuel up and get back on the trail.
Recovery Gear: Do Not Leave Home Without It
This is the section that could save your trip and maybe your neck. When you are 50 miles from the nearest paved road, you are your own rescue team. Period. Here is what I carry on every single overlanding trip.
Must-Have Recovery Gear Checklist
- Winch — A minimum of 9,500 lbs rated pull for a Wrangler. I run a Warn VR EVO 10-S with synthetic rope. Synthetic is lighter and safer than steel cable. If it snaps, it drops instead of whipping.
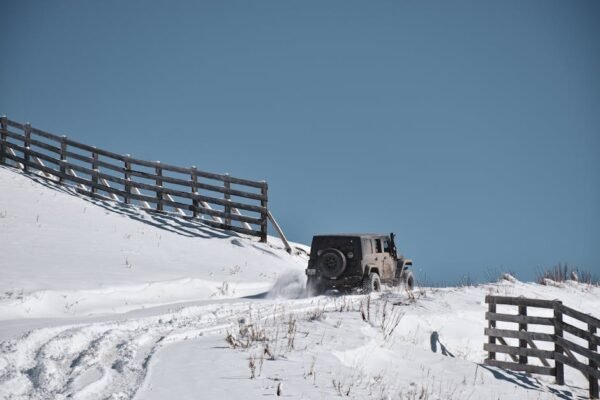
- Recovery boards — MAXTRAX are the original and still the best. Toss them under your tires when you are stuck in sand, mud, or snow. They work shockingly well.
- Snatch strap / kinetic recovery rope — Yankum Ropes makes an excellent kinetic rope. The stretch in these ropes helps pull a stuck vehicle without the jarring shock of a chain or static strap.
- D-ring shackles — At least two rated shackles. I use Factor 55 soft shackles because they are lighter and safer than steel.
- Hi-lift jack — A 48-inch or 60-inch Hi-Lift jack is a versatile tool. It can lift your Jeep for tire changes, act as a come-along winch in a pinch, and even serve as a clamp. Learn how to use it safely before you need it on the trail.
- Tire repair kit — A plug kit, a portable air compressor (I recommend the ARB Twin compressor), and a tire pressure gauge. You should be airing down on the trail and airing back up for the highway, so a compressor is non-negotiable.
- Shovel — A basic folding shovel. You would be surprised how often digging is the fastest way to get unstuck.
- Fire extinguisher — Mount one inside the cab where you can reach it. Electrical fires happen, especially when running extra accessories and dual-battery setups.
Navigation and Communication
Your phone is great until it is not. Cell service dies fast on overlanding routes, and GPS apps drain your battery. You need a navigation and communication plan that works off-grid.
Navigation
- Gaia GPS (premium subscription) — My go-to app. Download offline maps before you leave, and you have detailed topo maps without needing a signal. The off-road trail layers are incredibly useful for Jeep overlanding routes.
- OnX Offroad — Another excellent app with trail ratings, user reviews, and property boundary data so you know you are not accidentally trespassing.
- Paper maps and a compass — Old school? Yes. Reliable? Always. Your phone can break, your tablet can die. A USGS topo map of your area is cheap insurance.
Communication
- Garmin inReach Mini 2 — This is my number one safety recommendation. It sends and receives text messages via satellite from anywhere on Earth, and has an SOS button that contacts search and rescue with your exact GPS coordinates. If you buy one piece of gear from this entire article, make it this one.
- Midland MXT275 GMRS radio — A 15-watt GMRS radio mounted in the Jeep gives you reliable communication with your convoy up to several miles away, depending on terrain. Way more range than a handheld.
- Baofeng UV-5R handheld radio — A cheap, capable backup radio. Useful for spotting obstacles or coordinating with other vehicles at close range.
Electrical and Power
Running a fridge, charging devices, powering lights, and operating a winch all take electricity. The stock Jeep electrical system was not designed for this kind of load. At minimum, consider a dual-battery setup with an isolator so your accessories do not drain your starting battery. I run a Renogy 100W solar panel on my roof rack that keeps my auxiliary battery topped off during the day. For shorter trips, a portable power station like the Jackery Explorer 1000 is a simpler solution.
Overlanding Essentials Checklist: Your Quick-Start Packing List
I know that was a lot of information, so here is a condensed checklist you can use to prep for your first multi-day Jeep overlanding trip. Print it out, tape it to your garage wall, and check things off as you go.
Vehicle Prep
- 2.5-3.5 inch suspension lift installed and aligned
- All-terrain tires (33″ minimum) plus a full-size spare
- Front bumper with winch mount
- Rock sliders installed
- Skid plates on oil pan, transmission, and transfer case
- All fluids checked and fresh (oil, coolant, diff fluid, transfer case)
- Brakes inspected
- Roof rack rated for your tent and cargo
Camp Gear
- Rooftop tent or quality ground tent
- Sleeping bags rated for expected nighttime temps
- Camp stove and fuel
- Cookset (pots, pans, utensils, plates, cups)
- Cooler or 12V fridge stocked with food
- 10 gallons of water (two people, five days)
- Water filter as backup
- Headlamp and camp lantern
- Camp chairs (do not skip this — your back will thank you)
- First aid kit
Recovery and Safety
- Winch with synthetic rope
- Recovery boards
- Kinetic recovery rope
- Soft shackles (x2)
- Hi-lift jack
- Tire plug kit
- Portable air compressor
- Tire pressure gauge
- Folding shovel
- Fire extinguisher
- Tow strap
Navigation and Comms
- Gaia GPS or OnX Offroad with offline maps downloaded
- Garmin inReach or satellite communicator
- GMRS or ham radio
- Paper map and compass
- USB cables and charging solution
Final Thoughts: Just Get Out There
Look, I know this article covers a lot of gear, and the total price tag can seem intimidating. But here is the thing: you do not need all of this to start. My first overlanding trip was in a stock TJ with a ground tent, a cooler full of ice, and a prayer. Was it perfect? No. Was it one of the best weekends of my life? Absolutely.
Start with what you have. Add upgrades as your budget allows and as you figure out what matters most to your style of travel. Some people go all-in on the kitchen setup. Others prioritize the sleeping system. Personally, I will never travel without my Garmin inReach and a winch — those are my non-negotiables for safety.
The overlanding community is incredibly welcoming. Join a local Jeep club, check out forums like Expedition Portal or the overlanding subreddits, and do not be afraid to ask questions. Everyone started exactly where you are right now.
Build the Jeep. Pack the gear. Hit the trail. I promise you will not regret it.
See you on the trail.
— Jake Morrison