Setting Up Pi-hole on Your Home Network: Block Ads at the DNS Level
By Alex Torres | October 12, 2025 | Network & Privacy
A complete, start-to-finish Pi-hole setup tutorial covering bare-metal Raspberry Pi installation, Docker deployment, router configuration, blocklists, whitelisting, and troubleshooting.
Why I Finally Set Up Pi-hole (and Why You Should Too)
I used to rely on browser-based ad blockers. They worked fine on my laptop, but the moment I picked up my phone, fired up my smart TV, or asked a voice assistant to play something, the ads came flooding back. That frustration led me to Pi-hole, and honestly, it changed the way my entire home network feels.
Pi-hole is a network-wide DNS ad blocker. Instead of filtering ads inside each browser on each device, Pi-hole sits between your network and the internet and blocks ad-serving domains before they ever reach any device. Every phone, tablet, smart TV, game console, and IoT gadget on your network benefits automatically, with zero per-device configuration.
In this Pi-hole tutorial, I will walk you through the full setup process from start to finish. Whether you want to run Pi-hole on a dedicated Raspberry Pi or deploy it with Docker on a server you already own, I have you covered.
What Exactly Is Pi-hole?
At its core, Pi-hole is a DNS sinkhole. When a device on your network tries to load a resource (a webpage, an image, a tracking script), it first asks a DNS server to translate the domain name into an IP address. Pi-hole intercepts those requests and checks the domain against its blocklists. If the domain is known to serve ads or tracking content, Pi-hole returns a blank response instead of the real IP address. The ad never loads.
Here is what makes Pi-hole awesome:
- Network-wide coverage — one installation protects every device on your LAN.
- Lightweight — it runs comfortably on a Raspberry Pi Zero, consuming almost no power.
- Beautiful dashboard — real-time stats on queries, blocked domains, and client activity.
- Customizable blocklists — add community-curated lists or build your own.
- Whitelisting — easily unblock domains that get caught in the crossfire.
- Free and open source — no subscriptions, no data harvesting.
Choosing Your Hardware: Raspberry Pi vs. Docker on an Existing Server
You have two main paths for a Pi-hole setup, and neither is strictly better. It depends on what you already have lying around.
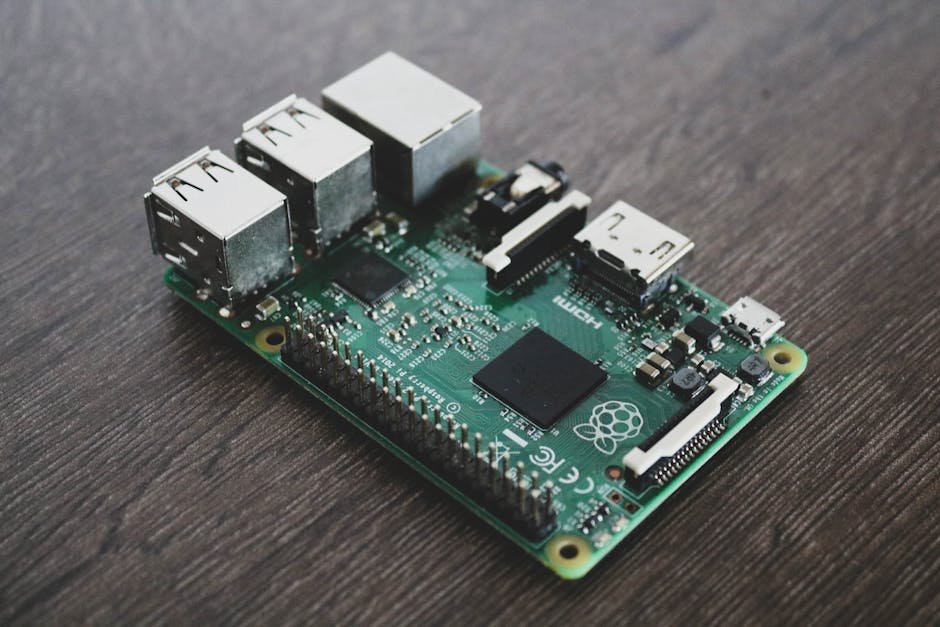
Option 1: Dedicated Raspberry Pi
This is the classic approach, and it is what gave Pi-hole its name. A Raspberry Pi 3, 4, or 5 is more than powerful enough. Even a Pi Zero 2 W handles it without breaking a sweat. You will need:
- A Raspberry Pi (any model with networking)
- A microSD card (8 GB minimum, 16 GB recommended)
- A power supply appropriate for your Pi model
- An Ethernet cable (recommended over Wi-Fi for DNS reliability)
- Raspberry Pi OS Lite installed on the SD card
The advantage here is isolation. Your DNS server runs on its own dedicated hardware, so it stays up even if you are tinkering with your main server. Power consumption is around 2-5 watts, so it costs virtually nothing to run 24/7.
Option 2: Pi-hole Docker Container
If you already run a home server, NAS, or any Linux box that stays on around the clock, deploying Pi-hole with Docker is fast and clean. No extra hardware needed. This is actually the route I went with, because I already had a small Intel NUC running Ubuntu Server as my home lab.
You will need:
- A Linux machine (or VM) with Docker and Docker Compose installed
- A static IP address on that machine
- Ports 53 (DNS), 80 (web dashboard), and 67 (DHCP, optional) available
Step 1: Assign a Static IP Address
Regardless of which path you choose, your Pi-hole machine needs a static IP. DNS is critical infrastructure for your network. If its IP changes, every device loses the ability to resolve domains.
On Raspberry Pi OS or Ubuntu Server, edit your network configuration. For systems using dhcpcd (Raspberry Pi OS):
sudo nano /etc/dhcpcd.confAdd the following at the bottom, adjusting for your network:
interface eth0
static ip_address=192.168.1.100/24
static routers=192.168.1.1
static domain_name_servers=1.1.1.1 8.8.8.8
For systems using Netplan (Ubuntu 20.04+), edit the YAML config:
sudo nano /etc/netplan/01-netcfg.yamlnetwork:
version: 2
ethernets:
eth0:
dhcp4: no
addresses:
- 192.168.1.100/24
routes:
- to: default
via: 192.168.1.1
nameservers:
addresses:
- 1.1.1.1
- 8.8.8.8Apply with:
sudo netplan applyStep 2A: Bare-Metal Installation on Raspberry Pi
This is the simplest installation method. SSH into your Pi (or open a terminal directly) and run the official one-liner:
curl -sSL https://install.pi-hole.net | bashThe installer is interactive and will guide you through several choices:
- Upstream DNS provider — I recommend Cloudflare (1.1.1.1) or Google (8.8.8.8). These are the servers Pi-hole forwards non-blocked queries to.
- Blocklists — accept the default list for now. We will add more later.
- Admin web interface — say yes. The dashboard is one of Pi-hole’s best features.
- Query logging — enable it. It is invaluable for troubleshooting.
- Privacy mode — choose your comfort level. I leave it on “Show everything” since it is my own home network.
When the installer finishes, it will display your admin dashboard URL and a randomly generated password. Write down the password or change it immediately:
pihole -a -p your_new_passwordVerify that Pi-hole is running:
pihole statusYou should see the service listed as active with your configured blocklist count.
Step 2B: Docker Installation (Pi-hole Docker Compose)
First, make sure Docker and Docker Compose are installed. On Ubuntu or Debian:
sudo apt update
sudo apt install docker.io docker-compose-v2 -y
sudo systemctl enable --now docker
sudo usermod -aG docker $USER
Log out and back in for the group change to take effect. Then create a directory for Pi-hole and a docker-compose.yml file:
mkdir -p ~/pihole && cd ~/pihole
nano docker-compose.yml
Paste the following configuration:
services:
  pihole:
    container_name: pihole
    image: pihole/pihole:latest
    ports:
      - "53:53/tcp"
      - "53:53/udp"
      - "80:80/tcp"
    environment:
      TZ: 'America/New_York'
      WEBPASSWORD: 'choose_a_strong_password'
      DNSMASQ_LISTENING: 'all'
    volumes:
      - './etc-pihole:/etc/pihole'
      - './etc-dnsmasq.d:/etc/dnsmasq.d'
    cap_add:
      - NET_ADMIN
    restart: unless-stopped
A few things to note:
- Change
TZto your timezone. - Set a real password for
WEBPASSWORD. - If port 53 is already in use (common on Ubuntu due to
systemd-resolved), you will need to disable it first.
Dealing with systemd-resolved on Ubuntu
Ubuntu’s built-in stub resolver binds to port 53 and will conflict with Pi-hole. Disable it:
sudo sed -r -i.bak 's/#?DNSStubListener=yes/DNSStubListener=no/' /etc/systemd/resolved.conf
sudo systemctl restart systemd-resolved
sudo ln -sf /run/systemd/resolve/resolv.conf /etc/resolv.conf
Now start Pi-hole:
cd ~/pihole
docker compose up -d
Check that the container is running:
docker psYou should see the pihole container listed with status “Up.” Test DNS resolution through Pi-hole:
dig @192.168.1.100 google.comIf you get an answer with an IP address, Pi-hole is working.
Step 3: Configure Your Router to Use Pi-hole as DNS
This is the most important step for network-wide ad blocking. You need to tell your router to hand out your Pi-hole’s IP address as the DNS server via DHCP.
- Log into your router’s admin panel (usually
192.168.1.1or192.168.0.1). - Find the DHCP settings. This is typically under LAN, Network, or DHCP configuration.
- Change the Primary DNS to your Pi-hole’s static IP (e.g.,
192.168.1.100). - Remove any secondary DNS or set it to the same Pi-hole IP. If you add a public DNS like 8.8.8.8 as secondary, devices may bypass Pi-hole when it is marginally slower.
- Save and reboot the router.
After this, every device that renews its DHCP lease will start using Pi-hole. To force an immediate renewal on a specific device, disconnect and reconnect it from Wi-Fi, or run:
# Linux / macOS
sudo dhclient -r && sudo dhclient

# Windows
ipconfig /release
ipconfig /renew
Verify a device is using Pi-hole by checking its DNS settings or by visiting an ad-heavy website and seeing the difference.
Step 4: Adding More Blocklists
Pi-hole ships with a solid default blocklist, but the community maintains many more. Adding extra lists dramatically improves coverage. Here are some popular ones I use:
- Steven Black’s Unified Hosts:
https://raw.githubusercontent.com/StevenBlack/hosts/master/hosts - Firebog Tick Lists (curated, low false positives):
https://v.firebog.net/hosts/lists.php?type=tick - OISD Blocklist:
https://dbl.oisd.nl/
To add blocklists through the web interface:
- Open the Pi-hole dashboard at
http://192.168.1.100/admin. - Log in with your admin password.
- Navigate to Adlists (under the Group Management menu in Pi-hole v6, or directly in the sidebar in v5).
- Paste the blocklist URL and click Add.
- After adding all your lists, update gravity to pull in the new domains:
pihole -gOr for Docker:
docker exec pihole pihole -gI went from about 80,000 blocked domains with the default list to over 350,000 after adding the lists above. The difference is noticeable, especially on mobile apps that are notoriously aggressive with ad networks.
Step 5: Whitelisting Domains
Aggressive blocklists occasionally catch legitimate domains. You will know it when a website partially loads, a login flow breaks, or a specific service stops working. The Pi-hole query log makes diagnosing this straightforward.
In the dashboard, go to Query Log, find the blocked domain that is causing issues, and click the whitelist button next to it. Or do it from the command line:
pihole -w example.comSome domains I have had to whitelist over time:
s.youtube.com— YouTube history tracking (needed for watch history to work)cdn.optimizely.com— some sites break without thisappleid.apple.com— Apple ID sign-ingravitech.net— needed for certain IoT devices
The community also maintains whitelist suggestions. Check the Pi-hole Discourse forums and GitHub if you run into issues with specific services.
The Pi-hole Dashboard: Your New Favorite Tab
The Pi-hole admin dashboard is genuinely impressive for a free tool. After a day or two of running, you will start to see eye-opening data about your network:
- Total queries — how many DNS lookups your network makes (it is more than you think).
- Queries blocked — typically 15-35% of all traffic, depending on your blocklists and device usage.
- Top permitted domains — what your devices are actually talking to.
- Top blocked domains — you will be surprised how often your smart TV phones home.
- Top clients — which devices generate the most DNS traffic.
- Query log — a real-time stream of every DNS request on your network.
The first time I looked at the dashboard after 24 hours, I discovered my smart TV was making hundreds of requests to telemetry and ad domains. All blocked silently by Pi-hole.
Common Issues and Troubleshooting
After running Pi-hole for months and helping friends set theirs up, here are the problems I see most often.
Devices Bypassing Pi-hole DNS
Some devices (notably Google Home, Chromecast, and certain Android phones) have hardcoded DNS servers (like 8.8.8.8) and will ignore whatever your router assigns via DHCP.
The fix is to block outbound DNS at the firewall level on your router, forcing all DNS traffic through Pi-hole:
# Example iptables rules (on your router, if it supports custom rules)
iptables -t nat -A PREROUTING -i br0 -p tcp --dport 53 ! -d 192.168.1.100 -j DNAT --to 192.168.1.100:53
iptables -t nat -A PREROUTING -i br0 -p udp --dport 53 ! -d 192.168.1.100 -j DNAT --to 192.168.1.100:53
This redirects any DNS query headed for a non-Pi-hole DNS server back to Pi-hole. Not all consumer routers support this, but if yours runs OpenWrt, pfSense, or OPNsense, you are in luck.
Slow DNS Resolution
If you notice a slight delay when loading pages after setting up Pi-hole, check a few things:
- Use Ethernet, not Wi-Fi, for the Pi-hole machine if possible. Wi-Fi latency adds up on DNS lookups.
- Check your upstream DNS. If Pi-hole is forwarding to a slow upstream resolver, everything downstream suffers. Switch to Cloudflare (1.1.1.1) or run Unbound as a local recursive resolver for the best performance.
- Increase Pi-hole’s cache size. Edit
/etc/dnsmasq.d/01-pihole.confand setcache-size=10000(default is 10000 in recent versions, but older installs may have a lower value).
Website or App Stops Working
When something breaks after enabling Pi-hole, the query log is your best friend. Open the dashboard, go to Query Log, and look for red-highlighted (blocked) entries around the time the issue occurred. Whitelist the offending domain and test again. If you are not sure which blocked domain is the culprit, you can temporarily disable Pi-hole:
# Disable for 5 minutes (then auto re-enables)
pihole disable 5m
If the site works with Pi-hole disabled, the problem is definitely a blocked domain. Narrow it down from the query log.
Pi-hole Not Blocking Ads on HTTPS Sites
Pi-hole blocks at the DNS level, which means it cannot block ads served from the same domain as the content (for example, YouTube ads come from YouTube’s own servers). For those cases, you will still want a browser-based ad blocker like uBlock Origin running alongside Pi-hole. The two complement each other well.
Docker Container Not Starting
If your Pi-hole Docker container exits immediately, the most common causes are:
- Port 53 is already in use (check with
sudo lsof -i :53). - Permission issues on the volume mount directories. Make sure the directories exist and are writable.
- Incorrect
docker-compose.ymlsyntax. Validate it withdocker compose config.
Optional: Running Unbound as a Recursive DNS Resolver
For maximum privacy, you can pair Pi-hole with Unbound, a recursive DNS resolver that talks directly to authoritative name servers instead of forwarding your queries to Cloudflare or Google. This means no third party sees your full query history.
Install Unbound on the same machine:
sudo apt install unbound -yCreate a Pi-hole-specific configuration file:
sudo nano /etc/unbound/unbound.conf.d/pi-hole.confserver:
verbosity: 0
interface: 127.0.0.1
port: 5335
do-ip4: yes
do-udp: yes
do-tcp: yes
do-ip6: no
prefer-ip6: no
harden-glue: yes
harden-dnssec-stripped: yes
use-caps-for-id: no
edns-buffer-size: 1232
prefetch: yes
num-threads: 1
so-rcvbuf: 1m
private-address: 192.168.0.0/16
private-address: 172.16.0.0/12
private-address: 10.0.0.0/8Restart Unbound and test it:
sudo systemctl restart unbound
dig @127.0.0.1 -p 5335 google.com
Then in the Pi-hole admin dashboard, go to Settings > DNS, uncheck all upstream servers, and add 127.0.0.1#5335 as a custom upstream DNS server. Now your DNS queries never leave your network until they reach the authoritative servers directly.
Keeping Pi-hole Updated
Pi-hole is actively maintained, and updates bring new features, security patches, and compatibility fixes. Update regularly:
# Bare-metal installation
pihole -up

# Docker installation
cd ~/pihole
docker compose pull
docker compose up -d
I check for updates once a month. It takes about 30 seconds and has never broken my setup.
Final Thoughts
Setting up Pi-hole is one of those projects that takes less than an hour but pays dividends every single day. My network is faster (fewer ad resources to load), more private (trackers get blocked before they even connect), and cleaner (no more banner ads on mobile apps). The Raspberry Pi ad blocker approach is the classic way to go, but the Pi-hole Docker deployment is equally solid if you already have a server running.
If you have been on the fence about network-wide ad blocking, I genuinely encourage you to try it this weekend. The setup is straightforward, the results are immediate, and you will wonder why you did not do it sooner.
Got questions or ran into an issue I did not cover? Drop a comment below or find me on the IGNA Online community forum. Happy blocking.
— Alex Torres