
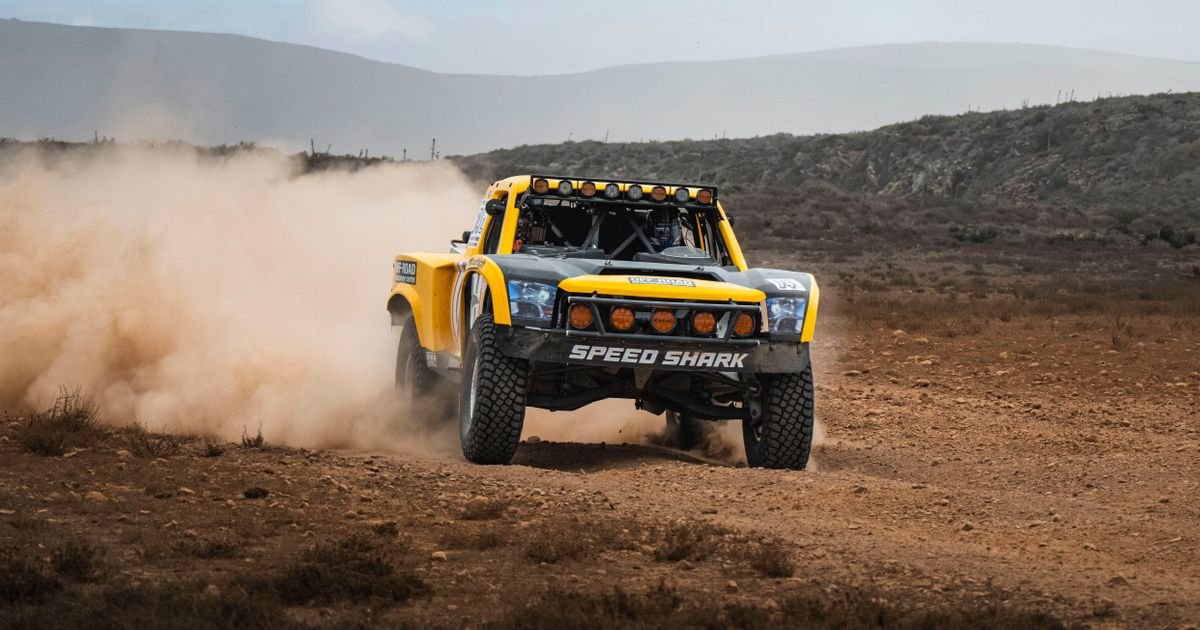

Nothing transforms your trail experience quite like proper lighting. Whether you’re crawling technical rock ledges at dusk, running forest roads after dark, or setting up camp on a moonless night, the right off-road lights make the difference between a confident driver and someone white-knuckling through the darkness. I’ve tested dozens of setups over the years — from budget Amazon light bars to top-shelf Baja Designs and KC HiLiTES — and this guide covers everything you need to know to build a solid lighting system on your Jeep, truck, or rig.
This isn’t a “just buy this one” post. Off-road lighting is genuinely situational: what works for a rock crawler in Moab is different from what a high-speed desert runner needs, and neither of those is what a weekend overlander wants for camp illumination. We’ll break down the types, the specs that matter, the specs that don’t, and give you a framework to build the setup that fits your actual use case.
Understanding the Types of Off-Road Lights
1. Light Bars
Light bars are the most visible (literally) off-road upgrade you can make. They’re horizontal LED arrays that come in sizes from 6 inches all the way to 50+ inches. A good light bar throws a wide, far-reaching wall of light in front of your rig — ideal for high-speed desert or open trail running where you want maximum forward illumination.
The tradeoff with big light bars is mounting location. A roof-mounted 50-inch bar gives you insane visibility but creates glare on hoods and windshields. A bumper-mounted bar throws light lower, which is excellent for close-in terrain reading but won’t light up far obstacles. Most serious builds end up with both — a roof or windshield-pillar bar for long-distance visibility and a bumper bar or pods for close-in detail.
2. Driving/Auxiliary Lights (Pods and Round Lights)
Pod lights and round auxiliary lights give you targeted, powerful beams you can aim independently. The classic KC HiLiTES Slimlite design has been mounted on Jeeps since the 1970s for good reason — round lights with a proper reflector housing push a tightly focused spot beam further than most LED bars at the same wattage. Modern LED versions like the KC Flex ERA 3 or Baja Designs Squadron Sport do this even better.
Pods are typically sold in pairs and mounted on A-pillars, bumper ends, or ditch positions on the roof corners. Ditch lights are particularly useful because they illuminate the terrain right beside the vehicle — exactly what you need when picking lines between boulders or spotting the edge of a shelf road.
3. Rock Lights
Rock lights are small, usually round LED pods mounted under the vehicle to illuminate the ground directly beneath the rig. They serve two purposes: seeing the rocks and obstacles under your vehicle while crawling, and trail ambiance and camp lighting at night. A quality set of 8 rock lights — one per corner plus one at each rocker panel — transforms close-quarters rock crawling and makes camp setup at night dramatically easier.
Look for IP68 or IP69K rated rock lights. They’ll be fully submerged on stream crossings and coated in mud, so cheap IP67 units won’t survive a full season. Rigid Industries, Stedi, and Nilight all make solid options. RGBW rock lights controlled via app or switch panel are popular, though for pure utility, plain white units are brighter and simpler.
4. Flood Lights and Scene Lights
Work/flood lights are wide-beam lights mounted on the rear or sides of the rig for camp illumination and recovery situations. A pair of 6-inch flood pods on the rear bumper makes nighttime camp setup, gear loading, and tire changes infinitely easier. They’re also invaluable during recovery — when you’re winching at midnight, you want to actually see what you’re doing.
The Specs That Actually Matter
Lumens vs. Lux vs. “Effective Lumens”
Marketing departments have had a field day with light output numbers. Raw lumen ratings — the total light output of the LEDs — are often wildly inflated by cheap manufacturers. A better metric is lux at distance (measured illuminance at a specific point), but even these can be gamed in controlled testing environments.
The most honest spec is effective lumens — the light that actually exits the housing after accounting for lens losses, reflector inefficiency, and thermal throttling. A quality 50-inch bar from Rigid Industries or Baja Designs will publish realistic effective lumen numbers. A cheap bar claiming 50,000 lumens for $60 is lying by a factor of 3–5x.
Rule of thumb: A reputable name-brand 50-inch combo bar will put out 15,000–22,000 effective lumens. Anything claiming 50,000 lumens from a bargain-bin bar should be ignored completely.
Color Temperature
Most quality off-road LEDs run between 5,000K and 6,000K (cool white). This is the sweet spot for off-road visibility — pure white light with a slight blue tint maximizes perceived contrast and distance. Avoid 4,000K warm white for forward lighting; it looks great in camp but reduces your ability to pick out trail edges and obstacles at speed. Yellow/amber tinted lights (2,700K–3,500K) penetrate dust and fog better but wash out color contrast on dry dirt trails.
For fog and dust: amber is genuinely better. For dry night driving: 5,500–6,000K cool white wins every time.
Beam Pattern: Spot, Flood, or Combo
- Spot: Tight, focused beam reaching 500m+. Best for high-speed driving where you need to see far obstacles early. Less useful close in.
- Flood: Wide, diffuse beam covering terrain 20–60m in front of you. Excellent for slow crawling and technical terrain where you need to see the full width of the trail.
- Combo: A mix of spot and flood LEDs in one bar. The most versatile choice for general off-roading — you get good close coverage plus reasonable distance.
- Driving: A hybrid pattern between spot and flood, more focused than flood but wider than spot. Many quality pods use a driving pattern.
For a single-bar setup, combo is the practical choice. If you’re running multiple lights, pairing a spot-focused roof bar with flood pods on the bumper gives you the best of both worlds for any terrain.
IP Rating
IP68 is the minimum for any off-road light that will regularly see water, mud, and dust. IP69K (high-pressure, high-temperature wash-down resistant) is the gold standard. Lights mounted low on bumpers will get full mud submersion on creek crossings — don’t cheap out on waterproofing.
Operating Voltage and Amperage
Know your electrical load before you wire anything. Most 12V LED off-road lights pull significantly less current than old halogen equivalents, but you still need to know what you’re drawing:
- A quality 50-inch combo bar: typically 150–240W = 12.5–20A at 12V
- A pair of 3-inch pods: typically 20–40W total = 1.7–3.3A at 12V
- A set of 8 rock lights: typically 20–40W total = 1.7–3.3A at 12V
You’ll need a relay for any light bar drawing over 10A. Running that current through a switch without a relay will melt the switch and could cause a fire. Most quality light bars include a relay harness. If yours doesn’t, pick one up — they run $15–30 from any off-road retailer.
Top Picks for 2026 by Category
Best Overall Light Bar: Baja Designs S8 Series
The Baja Designs S8 is the gold standard for light bar performance and build quality. It’s expensive — a 50-inch S8 runs $900–$1,100 — but it earns the price with genuine optical engineering, a lifetime warranty, and lux numbers that match the claims. The S8 uses multi-reflector optics rather than bare LED chips behind a lens, producing a more usable and consistent beam pattern. If you’re serious about off-road lighting and want to buy once and buy right, this is the bar.
Best Value Light Bar: Rough Country Black Series
Rough Country’s Black Series bars hit the sweet spot between quality and price. At $150–200 for a 50-inch bar, you’re not getting Baja Designs optics, but you are getting an IP68-rated bar with real reflectors (not just bare LEDs), solid construction, and a relay harness included. I’ve run a 40-inch Black Series on my TJ for three seasons through Colorado mud, Utah sand, and Pacific Northwest rain without a single issue.
Best Pods/Driving Lights: KC HiLiTES Flex ERA 3 LED
KC’s Flex ERA 3 (3-inch pods) offer adjustable beam angles in a compact, bombproof housing. The insert is swappable, so you can configure them as spot, driving, or combo. At $150–180 per pair, they’re not cheap, but the IP69K rating and field-adjustable beam make them worth it for ditch-light or A-pillar mounts. The round housing is also the classic Jeep look if that matters to you.
Best Rock Lights: Nilight RGBW Rock Lights (8-Pack)
Nilight’s 8-pack RGBW units give you IP68 protection, decent brightness, and Bluetooth app control for $50–70. They’re not the brightest units on the market but they’re reliable, easy to install, and the RGBW capability gives you full-white for actual illumination plus color for camp ambiance. If you want maximum brightness and don’t care about color: Rigid Industries 30-Degree Rock Lights at $25–35 each are brighter but plain white.
Best Budget Complete Setup Under $300: Auxbeam F-16 Series Combo
For the budget-conscious wheeler who wants real improvement over stock headlights without a four-figure lighting bill, the Auxbeam F-16 50-inch light bar ($100–120) paired with a set of Auxbeam 3-inch pods ($40–60/pair) delivers a functional setup that holds up on real trails. The F-16 uses actual reflectors rather than bare-chip designs, which produces a more usable beam pattern than most competitors at this price point.
Mounting Considerations
Roof Mounts
Roof mounting maximizes height for forward visibility and pairs well with combo or flood pattern bars. Downsides: glare on the hood (especially with lighter colors), adds height to your rig (watch clearance in tight tree lines), and creates noticeable wind noise on highway drives. Use a windshield glare visor with any bar at roof height — most quality light bar brands sell matching visors that clip directly onto the bar.
Bumper Mounts
Bumper-mounted bars sit low, reduce glare, and read close-in terrain better. The downside is increased exposure to impacts — a low-mounted bar will hit obstacles that a roof bar would clear. For serious rock crawling, consider recessing the bar into a bumper cutout or using pods with more protected mounting positions. How you run your bumper also affects this — check out the Overlanding 101 Jeep setup guide for how bumper selection shapes your overall build.
A-Pillar and Ditch Mounts
Ditch lights mounted on the front corners of the roof are one of the most functional placements for Jeep and truck owners. They illuminate the terrain right beside and just ahead of the vehicle — exactly the view you need for picking lines in technical terrain. A-pillar mounts sit slightly lower and are easier to install on rigs without roof rails. For JK/JL Wranglers, dedicated ditch light brackets bolt onto existing hardware with no drilling required.
Wiring It Right
The most common DIY lighting mistake is undersized wire. Use this as a minimum guide for 12V systems:
- Under 10A: 16-gauge wire is adequate
- 10–20A: 14-gauge minimum, 12-gauge preferred
- 20–30A: 12-gauge minimum, 10-gauge preferred
- 30A+: 10-gauge or 8-gauge depending on run length
Always fuse at the battery end, not at the light end. A relay between the switch and the light protects both your wiring and your switch. For multi-light setups with total current over 30A, run a single heavy-gauge dedicated feed from the battery with multiple relay-switched branches off it — cleaner than running individual feeds per light and reduces voltage drop. If you’ve built out your vehicle for extended overland trips with air management and onboard power, integrate your lighting load into that electrical plan from the start.
Ground at the chassis near each light, not back to the battery. A local chassis ground reduces wiring complexity and performs identically to a battery ground if the contact is clean — bare metal to bare metal, no paint in the joint.
Legal Considerations
Light bar legality varies significantly by state. In most U.S. states, auxiliary lights that exceed certain brightness thresholds or are mounted above specific heights must be covered or switched off on public roads. Many states require auxiliary lights to be switched separately from headlights. California has particularly strict rules about lights mounted above the roofline.
The practical answer: get a light bar cover ($20–30) or use a relay wired so the light bar cannot power on without a deliberate switch activation. A cover serves double duty — legal compliance on public roads and protecting LEDs from rock chips during daily driving. The Recovery Gear guide covers the full kit you should have on board before heading out at night, lights and all.
Check your state’s vehicle code for specifics on auxiliary lights before wiring anything. Fines for uncovered light bars on public roads can run $100–500 depending on jurisdiction, and it’s not worth the hassle.
Putting It All Together: Build Priority Order
For most Jeep and truck owners building their first real lighting setup, here’s the order I’d recommend:
- Upgrade headlights first. Modern LED or projector headlight upgrades for JK/JL Wranglers dramatically improve baseline visibility before you add anything. Start here if you haven’t — it’s the highest-impact, lowest-hassle improvement.
- Add ditch lights or A-pillar pods. The biggest functional improvement per dollar for technical off-roading. Illuminate right beside your front wheels and you’ll immediately drive more confidently on tight trails.
- Rear work lights. A pair of 6-inch flood pods on the rear bumper for camp and recovery situations. Cheap, practical, and something you’ll use every trip.
- Rock lights. Once you’ve covered the above, rock lights are the icing — excellent for crawling and camp lighting, but they don’t replace good forward visibility.
- Light bar. If you do high-speed trail running or desert driving, a roof or bumper light bar is the final step. For slow technical crawling, you may find you don’t need one at all once you have good ditch lights and upgraded headlights.
Building in stages lets you dial in the wiring incrementally rather than planning a complete multi-light system all at once — and it lets your bank account keep pace with your ambitions. Light up your build the right way, one system at a time, and you’ll never dread a late trail departure again.

Leave a Reply