Understanding VLANs: A Practical Guide to Network Segmentation
If you have ever looked at your home network and realized that your smart light bulbs, your NAS full of family photos, and your kids’ tablets are all sharing the same flat Layer 2 domain, you have already identified the problem. You just might not have known the solution yet. That solution is VLANs, and once you understand them, you will wonder how you ever ran a network without them.
I have been segmenting networks with VLANs for years, first in enterprise environments and then in my own homelab. In this VLAN tutorial, I am going to walk you through everything from the underlying concept to actual CLI configuration on a managed switch. By the time we are done, you will have the knowledge to carve your flat network into isolated, purpose-built segments that improve both security and performance.
What Is a VLAN, Exactly?
A VLAN (see our network security guide), or Virtual Local Area Network, is a logical partition of a physical network at Layer 2. In plain terms, it lets you take a single physical switch and divide it into multiple independent broadcast domains. Devices on VLAN 10 cannot see broadcast traffic from devices on VLAN 20, even though they are plugged into the same piece of hardware. As far as those devices are concerned, they are on entirely separate networks.
Think of it this way. A traditional unmanaged switch treats every port as part of one big neighborhood. Every device can shout (broadcast) and every other device hears it. A managed switch with VLAN support lets you draw invisible walls between groups of ports. Devices within the same VLAN can communicate freely, but traffic between VLANs has to pass through a router or a Layer 3 switch, where you can apply firewall rules and access control lists.
VLANs are defined by the IEEE 802.1Q standard, which specifies how a 4-byte tag is inserted into an Ethernet frame to identify which VLAN the frame belongs to. This tag contains a 12-bit VLAN ID field, which gives us a range of 1 to 4094 usable VLAN IDs. VLAN 1 is typically the default and should be avoided for production traffic, and VLANs 1002 through 1005 are reserved on Cisco gear for legacy Token Ring and FDDI support.
Why Network Segmentation Matters
I get asked this a lot, especially by homelabbers who are just getting started: “Why bother? My network works fine.” And sure, it does work. Until it does not. Here are the reasons I consider network segmentation non-negotiable, even in a home environment.
Security Isolation
This is the big one. Every IoT device on your network is a potential attack surface. That cheap IP camera from a no-name brand on Amazon? It might be phoning home to servers you have never heard of. If that camera sits on the same VLAN as your file server, a compromised camera could potentially be used as a pivot point to reach your sensitive data.
With VLANs, you isolate those devices. My IoT devices live on VLAN 40 (see our Cisco IOS comparison), and the firewall rules between VLAN 40 and my trusted VLAN are extremely restrictive. Those cameras can reach the internet for firmware updates and NTP, but they cannot initiate a single connection to my server VLAN. If one gets compromised, the blast radius is contained.
Performance and Broadcast Control
Every device on a flat network contributes to the broadcast domain. ARP requests, DHCP discovers, mDNS announcements, NetBIOS chatter: it all adds up. On a small network with ten devices, you will never notice. On a network with fifty or a hundred devices, especially chatty IoT gear, that broadcast traffic can become measurable overhead. VLANs shrink each broadcast domain, which means less noise on every segment.
Organizational Clarity
This benefit is underrated. When I look at my network map, I can immediately tell what any device is doing based on its IP address. My server VLAN uses the 10.0.10.0/24 subnet, my personal devices are on 10.0.20.0/24, my IoT devices are on 10.0.40.0/24, and my guest network is on 10.0.50.0/24. Troubleshooting becomes dramatically easier when the network architecture is self-documenting.
Types of VLANs
Before we get into configuration, let me clarify the different types of VLANs you will encounter. These are not different technologies; they are functional categories that describe how a VLAN is being used.
- Data VLAN (User VLAN): Carries regular user-generated traffic. This is the most common type and what most people mean when they say “VLAN.”
- Management VLAN: Used to access the management interfaces of network devices (switches, access points, etc.). Keeping management traffic on its own VLAN prevents regular users from reaching your switch web interfaces or SSH endpoints.
- Voice VLAN: A dedicated VLAN for VoIP traffic. Cisco switches can automatically assign IP phones to a voice VLAN using CDP or LLDP, which simplifies deployment and ensures QoS policies are applied correctly.
- Native VLAN: The VLAN assigned to untagged traffic on a trunk port. By default this is VLAN 1 on Cisco gear, and I strongly recommend changing it to an unused VLAN to mitigate VLAN hopping attacks.
- Guest VLAN: An isolated segment for untrusted devices. Visitors connect here and get internet access but nothing else.
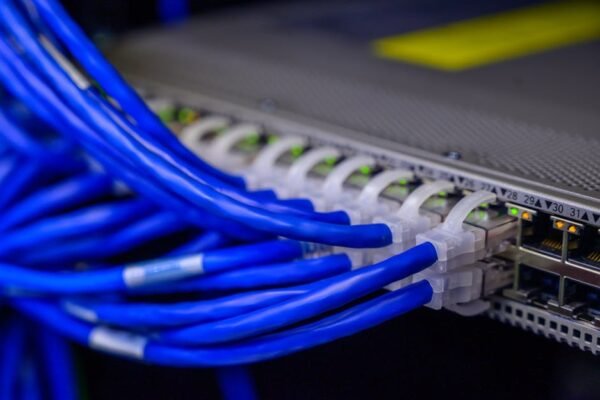
Access Ports vs Trunk Ports
This is a concept that trips up newcomers more than almost anything else, so let me be precise about it.
An access port belongs to exactly one VLAN. The device connected to that port has no idea VLANs exist. The switch strips the VLAN tag from outgoing frames and adds the appropriate tag to incoming frames. Your laptop, your printer, your IoT sensor: these all connect to access ports. The device sends and receives normal, untagged Ethernet frames.
A trunk port carries traffic for multiple VLANs simultaneously. Frames on a trunk port are tagged with their VLAN ID using the 802.1Q standard (with the exception of the native VLAN, which travels untagged). Trunk ports are used for switch-to-switch links, switch-to-router links, and switch-to-hypervisor links, anywhere you need multiple VLANs to traverse a single physical connection.
Here is a practical example. Suppose you have two switches on different floors, each with devices on VLANs 10, 20, and 40. The uplink between those two switches must be a trunk port so that traffic from all three VLANs can cross between them. Meanwhile, the port where a desktop computer plugs in is an access port assigned to VLAN 20.
Configuring VLANs on a Cisco Managed Switch
Let me walk through a real-world VLAN configuration on a Cisco Catalyst switch running IOS. This is the exact process I used when setting up my homelab network, and it translates directly to production environments.
Step 1: Create the VLANs
First, enter global configuration mode and define your VLANs. I am going to create four VLANs for a typical homelab segmentation scheme.
Switch> enable
Switch# configure terminal

Switch(config)# vlan 10
Switch(config-vlan)# name SERVERS
Switch(config-vlan)# exit

Switch(config)# vlan 20
Switch(config-vlan)# name PERSONAL
Switch(config-vlan)# exit

Switch(config)# vlan 40
Switch(config-vlan)# name IOT
Switch(config-vlan)# exit

Switch(config)# vlan 50
Switch(config-vlan)# name GUEST
Switch(config-vlan)# exit
Naming your VLANs is optional but strongly recommended. When you run show vlan brief six months from now, you will thank yourself for using descriptive names instead of trying to remember what VLAN 40 was for.
Step 2: Assign Access Ports
Next, assign individual switch ports to the appropriate VLANs. Here I am putting ports 1 through 8 on the server VLAN and ports 9 through 16 on the personal devices VLAN.
Switch(config)# interface range GigabitEthernet0/1 - 8
Switch(config-if-range)# switchport mode access
Switch(config-if-range)# switchport access vlan 10
Switch(config-if-range)# spanning-tree portfast
Switch(config-if-range)# exit

Switch(config)# interface range GigabitEthernet0/9 - 16
Switch(config-if-range)# switchport mode access
Switch(config-if-range)# switchport access vlan 20
Switch(config-if-range)# spanning-tree portfast
Switch(config-if-range)# exit
Notice the spanning-tree portfast command. This tells the switch that these are edge ports connected to end devices, not other switches, so it can skip the normal STP listening and learning states and bring the port to a forwarding state immediately. Do not enable PortFast on ports that connect to other switches (see our Catalyst vs Meraki), or you risk creating a bridging loop.
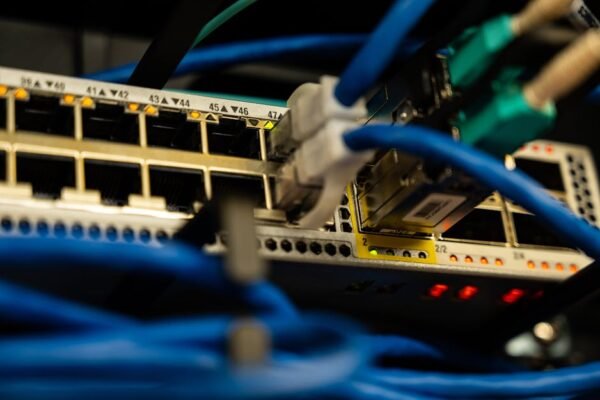
Step 3: Configure a Trunk Port
Now let me configure the uplink port that connects to my router (an OPNsense box running on a mini PC). This port needs to carry tagged traffic for all four VLANs.
Switch(config)# interface GigabitEthernet0/48
Switch(config-if)# switchport mode trunk
Switch(config-if)# switchport trunk encapsulation dot1q
Switch(config-if)# switchport trunk allowed vlan 10,20,40,50
Switch(config-if)# switchport trunk native vlan 999
Switch(config-if)# exit
A few things to note here. I explicitly list the allowed VLANs on the trunk with switchport trunk allowed vlan. This is a security best practice; you do not want a trunk carrying every VLAN in your database if only four are needed. I also changed the native VLAN to 999, an unused VLAN, to prevent native VLAN mismatch attacks and VLAN hopping via double-tagging.
The switchport trunk encapsulation dot1q command may or may not be required depending on your switch model. Newer Catalyst switches that only support 802.1Q will accept the trunk mode command without specifying encapsulation. Older models that also support ISL need it set explicitly.
Step 4: Verify Your Configuration
Always verify. Here are the commands I run after every VLAN change.
Switch# show vlan brief

VLAN Name                             Status    Ports
---- -------------------------------- --------- ----------------------------
1    default                          active    Gi0/17, Gi0/18, Gi0/19...
10   SERVERS                          active    Gi0/1, Gi0/2, Gi0/3...
20   PERSONAL                         active    Gi0/9, Gi0/10, Gi0/11...
40   IOT                              active
50   GUEST                            active
999  NATIVE_UNUSED                    active

Switch# show interfaces trunk

Port        Mode         Encapsulation  Status        Native vlan
Gi0/48      on           802.1q         trunking      999

Port        Vlans allowed on trunk
Gi0/48      10,20,40,50
If your VLANs are not showing the correct ports, go back and double-check your switchport access vlan assignments. If a trunk is not coming up, verify that both sides of the link agree on the encapsulation type and trunk mode.
Step 5: Save Your Configuration
This step seems obvious, but I have seen people lose hours of work because they forgot it.
Switch# copy running-config startup-config
Destination filename [startup-config]?
Building configuration...
[OK]
Inter-VLAN Routing
Creating VLANs gives you isolation, but isolation by itself means those segments cannot talk to each other at all. That is often too restrictive. Your personal devices probably need to reach the file server on the server VLAN. Your IoT devices might need to reach an MQTT broker. This is where inter-VLAN routing comes in.
There are two common approaches.
Router on a Stick
This is the classic method and the one most homelabbers will use. A single physical interface on your router connects to a trunk port on the switch. The router creates sub-interfaces, one per VLAN, each with its own IP address that serves as the default gateway for that VLAN.
On a Cisco router, the configuration looks like this:
Router(config)# interface GigabitEthernet0/0
Router(config-if)# no shutdown

Router(config)# interface GigabitEthernet0/0.10
Router(config-subif)# encapsulation dot1Q 10
Router(config-subif)# ip address 10.0.10.1 255.255.255.0

Router(config)# interface GigabitEthernet0/0.20
Router(config-subif)# encapsulation dot1Q 20
Router(config-subif)# ip address 10.0.20.1 255.255.255.0

Router(config)# interface GigabitEthernet0/0.40
Router(config-subif)# encapsulation dot1Q 40
Router(config-subif)# ip address 10.0.40.1 255.255.255.0

Router(config)# interface GigabitEthernet0/0.50
Router(config-subif)# encapsulation dot1Q 50
Router(config-subif)# ip address 10.0.50.1 255.255.255.0
If you are using OPNsense or pfSense as your router (and in a homelab, you probably should be), you create VLAN interfaces under the parent interface in the web GUI, assign each one an IP address, and then write firewall rules to control which VLANs can talk to which. The concept is identical; only the interface is different.
Layer 3 Switching (SVI)
If you have a Layer 3 capable switch like a Cisco Catalyst 3560, 3750, or 9200, you can do the routing directly on the switch using Switched Virtual Interfaces (SVIs). This eliminates the bottleneck of pushing all inter-VLAN traffic through a single router link.
Switch(config)# ip routing

Switch(config)# interface vlan 10
Switch(config-if)# ip address 10.0.10.1 255.255.255.0
Switch(config-if)# no shutdown

Switch(config)# interface vlan 20
Switch(config-if)# ip address 10.0.20.1 255.255.255.0
Switch(config-if)# no shutdown
Layer 3 switching is faster because the traffic never leaves the switch backplane. The downside is that your firewall rules now live on the switch (as ACLs), which can be less flexible and harder to manage than a dedicated firewall appliance. In my setup, I use the Layer 3 switch for routing between trusted VLANs and send traffic to my OPNsense firewall when it crosses trust boundaries.
A Practical Homelab VLAN Design
Let me share the VLAN layout I actually run. This is not theoretical; this is what is handling traffic in my rack right now.
| VLAN ID | Name | Subnet | Purpose |
|---|---|---|---|
| 10 | SERVERS | 10.0.10.0/24 | Proxmox hosts, NAS, Docker hosts |
| 20 | PERSONAL | 10.0.20.0/24 | Laptops, desktops, phones |
| 30 | MANAGEMENT | 10.0.30.0/24 | Switch management, AP management, IPMI/iDRAC |
| 40 | IOT | 10.0.40.0/24 | Smart home devices, cameras, sensors |
| 50 | GUEST | 10.0.50.0/24 | Visitor Wi-Fi, untrusted devices |
| 999 | NATIVE_UNUSED | None | Native VLAN on trunks (no devices assigned) |
The firewall rules follow a simple principle: traffic flows down the trust hierarchy but not up. Personal devices can reach servers. IoT devices can reach the internet and specific server endpoints (like my Home Assistant instance on VLAN 10), but they cannot initiate connections to the personal VLAN. The guest VLAN can reach the internet and absolutely nothing else.
Common Mistakes and How to Avoid Them
I have made most of these mistakes myself, so consider this a collection of lessons learned the hard way.
1. Forgetting to Allow the VLAN on the Trunk
You create a new VLAN, assign ports, and nothing works. Nine times out of ten, you forgot to add the new VLAN to the switchport trunk allowed vlan list on your uplink. Use switchport trunk allowed vlan add <vlan-id> to add a VLAN without removing the existing ones. If you use switchport trunk allowed vlan <vlan-id> without the add keyword, you will blow away every other VLAN on that trunk. Ask me how I know.
2. Using VLAN 1 for Production Traffic
VLAN 1 is the default VLAN on every Cisco switch, and all ports start in VLAN 1. It is also used for control plane protocols like CDP, VTP, and STP by default. Mixing your production traffic with control plane traffic is a security risk and a troubleshooting headache. Create dedicated VLANs for your actual traffic and leave VLAN 1 as empty as possible.
3. Native VLAN Mismatches
If Switch A has its trunk native VLAN set to 1 and Switch B has it set to 999, you will get a native VLAN mismatch. CDP will warn you about it, but the symptoms can be subtle: some traffic works, some does not, and the behavior is inconsistent. Always ensure both ends of a trunk agree on the native VLAN.
4. Not Running a Separate DHCP Scope per VLAN
Each VLAN is its own broadcast domain, which means DHCP broadcasts do not cross VLAN boundaries. You need either a DHCP server with a scope for each subnet or a DHCP relay agent (ip helper-address on the SVI or router sub-interface) that forwards DHCP requests to a centralized server. Forgetting this is the number one reason people create a VLAN and then wonder why devices cannot get an IP address.
Switch(config)# interface vlan 40
Switch(config-if)# ip helper-address 10.0.10.5
5. Overcomplicating the Design
I have seen homelab setups with fifteen or twenty VLANs. Unless you have a very specific reason for that level of granularity, you are creating management overhead for minimal security benefit. Four to six VLANs is the sweet spot for most homelabs. Each one should represent a distinct trust level or traffic type, not an individual device category.
6. Neglecting Port Security on Access Ports
An access port that accepts any device is an access port that can be abused. At minimum, consider enabling BPDU Guard on PortFast-enabled ports to prevent someone from plugging in a rogue switch and causing a spanning-tree topology change.
Switch(config)# interface range GigabitEthernet0/1 - 16
Switch(config-if-range)# spanning-tree bpduguard enable
Testing Your VLAN Segmentation
Configuration without verification is just hoping. After you set up your VLANs, test them.
- Ping within the VLAN: Two devices on the same VLAN should be able to ping each other without any routing. If they cannot, check your access port assignments and verify both devices are on the correct subnet.
- Ping across VLANs: A device on VLAN 10 should be able to ping the gateway on VLAN 20 only if inter-VLAN routing is configured. If your firewall is supposed to block this, verify that the ping fails.
- Test from the untrusted side: Connect a laptop to the IoT or guest VLAN and try to reach resources on the server VLAN. If you can, your firewall rules are wrong. Fix them before a compromised IoT device does it for real.
- Check for VLAN leakage: Run a packet capture on a trunk port and verify that you only see tagged traffic for the VLANs you expect. Wireshark decodes 802.1Q tags natively, making this straightforward.
Wrapping Up
VLANs are one of those foundational networking concepts that pay dividends the moment you implement them. You get better security through isolation, better performance through smaller broadcast domains, and better visibility through logical organization. The configuration is not difficult once you understand the distinction between access ports and trunk ports, and the CLI commands are consistent enough that you will have them memorized after your second or third setup.
If you are running a homelab on a flat network today, I would encourage you to pick up a used Cisco Catalyst switch (a 2960-S will cost you less than a dinner out), spend an afternoon setting up VLANs, and experience the difference for yourself. Start with three VLANs: one for trusted devices, one for IoT, and one for guests. You can always add more later, but those three alone will dramatically improve your network’s security posture.
As always, if you have questions or want to share your own VLAN design, drop a comment below or reach out on the IGNA Online community forum. I read every post.