
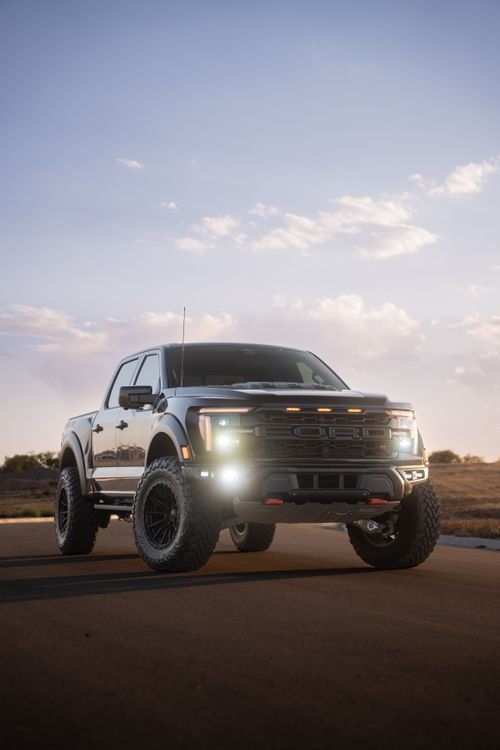

There’s nothing quite like the sinking feeling of realizing your headlights don’t cut it when you’re deep in the backcountry after sunset. Factory lighting on most Jeeps — especially older TJs, JKs, and even some JLs — is genuinely embarrassing compared to what aftermarket LED setups can do. If you’ve ever tried to navigate a rocky two-track with stock halogens, you already know what I mean.
In 2026, the off-road lighting market has matured significantly. You’re no longer choosing between “cheap and dim” and “expensive and complicated.” There’s now a wide range of solid LED options across every price point, and installation has gotten more straightforward. This guide breaks down everything you need to know about choosing and installing off-road lighting on your Jeep — light bars, pod lights, rock lights, and everything in between.
Why Off-Road Lighting Matters More Than You Think
Before we get into the gear, let’s be honest about what factory lighting actually gives you. Most stock Jeep headlights — even the newer quad-LED setups on JL/JT models — are designed to meet federal road standards, not to illuminate a dark forest road or rocky wash. They’re aimed to avoid blinding oncoming traffic, which means the cutoff is relatively sharp and the throw is limited.
Off-road auxiliary lights solve a different problem. They throw light much further down the trail, illuminate the sides of the trail, and let you see obstacles — rocks, ruts, dropoffs — well before your bumper gets to them. At speed on a dirt road, even an extra 50–100 feet of illumination is the difference between a confident night run and a white-knuckle crawl.
Beyond trail safety, good lighting transforms your camp setup. Flood-mode pod lights under the hood or on a roof rack mean you can set up camp after dark without fumbling with headlamps. Rock lights make crawling on technical terrain at night actually manageable.
Understanding the Three Main Types of Off-Road Lights
1. LED Light Bars
Light bars are the big, dramatic fixtures — the ones that make your Jeep look like it’s ready to film a car commercial in the desert. They range from compact 6-inch bars to 50-inch behemoths, and they come in spot, flood, and combo beam patterns.
Spot beam: Tight focus, long throw. Good for high-speed dirt roads where you want to see far ahead. Not great for technical terrain where you need wide illumination.
Flood beam: Wide spread, shorter throw. Great for slow-speed technical crawling, camp lighting, and filling in the periphery around your vehicle.
Combo beam: A mix of both — typically a row of spot LEDs down the center with flood LEDs on the outer edges. The most versatile option for all-around trail use.
For most Jeep builds, a 20–40 inch combo bar mounted on the roof rack or above the windshield covers the most scenarios. Bumper-mounted bars tend to get plastered with mud and debris, so if you’re doing mud runs, a higher mount is worth considering.
Popular picks in 2026:
- Baja Designs OnX6+ 30″ — The gold standard. Expensive (~$700–900), but the optics, housing quality, and waterproofing are genuinely best-in-class. Worth it if you run technical trails frequently at night.
- KC HiLites Flex LED 40″ — Modular system that lets you daisy-chain individual pods. Great flexibility for custom builds. Around $450–600.
- Rigid Industries Radiance+ 40″ — Good mid-range option with color backlit housing (a gimmick, but customers like it). Solid optics and IP68 rated. Around $350–500.
- Auxbeam 20-inch Combo — Budget-friendly (~$80–120), decent output for the money. If you’re occasional night-trailin and don’t want to spend Baja Designs money, Auxbeam and similar Amazon brands have improved a lot. Just don’t expect them to last a decade.
2. Pod Lights (Cube Lights / Spot/Flood Pods)
Pod lights are small individual units — typically 3-inch squares or rounds — that you can scatter around your build in ways a big light bar can’t accommodate. A-pillar mounts, bumper corners, hood vents, side mirrors, roof rack rails — pods go everywhere.
They’re the most versatile lighting option on a Jeep build because you can mix and match beam patterns and pointing angles. A pair of flood pods on your A-pillars pointed slightly inward and downward completely eliminates the “wall of darkness” right in front of the bumper that a distant-throw spot bar creates.
Popular pod picks:
- Baja Designs Squadron Pro — 5,000 lumen each, IP69K rated. The benchmark for serious builds. About $160–200 each.
- KC HiLites Flex Pod — Compatible with the Flex system above. Good output, modular. ~$80–120 each.
- Rigid Industries D-Series Pro — Industry staple. Reliable, bright, available in every beam pattern. ~$120–180 each.
- Nilight 4″ pods — Budget option. Good for camp lighting or backup lights where you don’t need maximum output. ~$30–50 for a pair.
3. Rock Lights
Rock lights are small, low-wattage LED pods mounted underneath the vehicle — frame rails, control arms, axle housings. Their job isn’t to illuminate the trail ahead; it’s to illuminate what’s under and immediately around your tires when you’re crawling.
On technical terrain at night, rock lights are what let you see whether your tire is going to land on a flat rock or a tipping ledge. They’re also genuinely useful at the trailhead when you’re airing down or checking your skid plates after a rough section.
Most rock light kits come with 6–8 pods and a wiring harness designed for the underbody environment. Look for IP67/IP68 rating at minimum — these lights take direct mud and water hits constantly.
Good rock light options:
- Baja Designs Rock Lights — Bright white output, very durable. ~$300 for a 6-pack.
- Smittybilt Rock Lights — More affordable at ~$80–100 for a 6-pack. Not quite the output of BD but solid for the price.
- Oracle Lighting Rock Lights — Available in color-changing RGB, white, and amber. Good quality, ~$100–200 for a 6-pack.
Mounting Options: Where to Put Your Lights
Roof / Roof Rack Mount
Best location for long-throw spot bars. High mounting angle means less glare reflected back into your eyes from the trail surface, and you stay out of the direct line of brush and debris. If you have a roof rack (Prinsu, Gobi, Front Runner, etc.), this is usually the first place to start.
Above-Windshield “Chase” Mount
Many Jeeps sport a light bar bracket that mounts to the windshield hinges or the roof edge, positioning a bar just above the windshield. This is lower than a full roof rack mount but still gets the bar up out of the worst of the debris. Good compromise if you don’t have a full rack.
Bumper Mount
Lower-profile and better for wide flood coverage right in front of the bumper. Drawbacks: mud exposure, more likely to get clogged with debris, and on tight trails you risk taking a branch to the lens. If you’re doing bumper lights, a solid waterproof/polycarbonate lens rating matters most here.
A-Pillar Mount
A-pillar pod mounts (Fishbone Offroad, Alien Sunshade, etc.) let you run a pair of small pod lights on the forward pillars. Excellent for filling in the sides of the trail that a forward-pointed bar doesn’t cover. I run a pair of Baja Designs Squadron Pros in flood on my A-pillars and they’re some of the most useful lights on my JK.
Wiring: Do It Right or Pay the Price
This is where a lot of budget builds go wrong. The lights themselves are often fine; the wiring is where things fail. Off-road electrical environments are brutal — vibration, water intrusion, heat, mud, and years of flex cycles on connectors. Cut corners here and you’re diagnosing a wiring fault on a dark trail instead of enjoying the run.
Key wiring principles:
- Use a relay and fuse harness. Don’t wire high-draw lights directly through your interior switch. A proper relay harness takes power directly from the battery, uses a relay triggered by your switch, and includes proper inline fusing. Most quality light bars include a harness — don’t skip it.
- Use marine-grade or OEM-style weatherproof connectors. Deutsch DT connectors or Weatherpack connectors at every junction. Standard crimp connectors will corrode. Period.
- Size your wire correctly. For a 40-inch bar drawing ~120W at 12V, you’re looking at ~10 amps. Use 12 AWG minimum for the run from the relay to the light, and 10 AWG from the battery to the relay.
- Route away from heat and moving parts. Keep wiring off exhaust components and protected from rubbing against anything with a sharp edge. Use split loom or conduit in exposed underbody runs.
- Fuse at the battery. The first fuse in your circuit should be within 18 inches of the battery positive terminal. This protects your entire wiring run from a short.
If you’re also adding a dual-battery system or auxiliary power setup for camp use, make sure your total lighting load fits within your system’s capacity. If you’re running a lot of lights, a complete overlanding electrical audit is worth doing before you pile on more accessories.
Switch Panel Integration
Once you have multiple auxiliary lights, you need a clean way to control them. Options range from simple toggle switches to sophisticated multi-function switch pods.
Simple toggles: You can mount individual rocker switches in an A-pillar pod, overhead console, or dash bracket. Works fine for 2–4 circuits.
Switch panel systems: Companies like sPOD, Spod Arc, and Auxbeam make dedicated fuse/relay systems with backlit rocker switch panels that replace the factory location (on Jeeps, the overhead console is a popular swap-in). These are clean, integrate nicely with the factory interior, and give you 6–8 fully fused/relayed circuits from one system.
CAN bus / digital switching: Higher-end options like Trigger Controllers or the Spod Source connect to your vehicle’s CAN bus and can be controlled via an app on your phone. Overkill for most builds, but genuinely cool for complex setups with scene programming (one tap for “camp mode” that turns on floods + rock lights simultaneously).
Legal Considerations
This part isn’t exciting, but it matters. In most U.S. states, off-road auxiliary lights are not legal for use on public roads unless they meet specific criteria — or are covered when driving on-road. Most states require that any light not designed to meet FMVSS-108 (the federal standard for vehicle lighting) must be switched off and/or covered on public roads.
Practically, this means:
- Light bar covers are not just an aesthetic choice — they’re often legally required when driving to the trailhead.
- Fog light pods (typically amber or white with proper DOT markings) are in a different legal category than pure off-road auxiliary lights.
- Check your state’s statutes. California and a few other states have specific additional requirements beyond the federal baseline.
Baja Designs and a handful of other premium brands sell lights that are dual-use certified — they can be legally used both on and off-road. It costs more, but it eliminates the cover headache for builds that see a lot of street driving.
My Recommended Build Sequence
If you’re building out from scratch, here’s how I’d sequence it based on bang-for-buck and utility priority:
- Start with a 20–30″ combo bar up top. This single upgrade does more to transform night trail driving than anything else. Budget $150–400 depending on brand.
- Add a pair of flood pods on the A-pillars. Fills in the side shadows the bar doesn’t cover. Makes a huge difference on twisty trails. Budget $80–400 per pair.
- Rock lights, once you’re doing technical terrain at night. Install them properly under the frame and axles. Budget $80–300 for a kit.
- Switch panel upgrade. Once you have 4+ auxiliary circuits, a dedicated switch panel is worth it for sanity and cleanliness.
Pair your lighting build with the rest of your recovery and trail prep. Having great lights doesn’t help if you’re spinning tires or short on gear — check out the top 10 recovery gear items for what else should be in your rig, and make sure you’re airing down properly once you hit the dirt.
Installation Tips and Common Mistakes
Aim before you tighten. Take the time to properly aim your lights before final tightening. A spot bar that’s aimed too low becomes useless beyond 30 feet; too high and you’re blinding oncoming traffic and reading signs instead of seeing the trail. Aim spot lights toward the horizon; flood lights slightly downward.
Apply dielectric grease to every connector. Moisture is the enemy. A thin application of dielectric grease to every electrical connection before assembly significantly extends connector life in wet/muddy environments.
Test before the permanent mount. Do a full power-on test with the lights temporarily positioned before committing to drilling holes or final bracket positioning. Much easier to adjust aim and position at this stage.
Protect exposed LED drivers. The LED driver module (usually in a sealed housing behind or adjacent to the lens) generates heat and doesn’t like sustained water immersion. Make sure the mounting position allows the housing to drain if water gets in, and don’t submerge a light bar that’s only rated IP67 (splash-proof vs. full immersion).
Label your switches. Sounds obvious, but when you have six toggles on a panel in the dark, unmarked switches are a genuine nuisance. Engrave, label, or use different colored illumination rings for each function.
Final Thoughts
Good off-road lighting is one of those mods where the value is immediately and dramatically obvious the first time you use it. Unlike suspension or lockers (both of which matter enormously), lighting delivers an obvious, visceral improvement on the first night trail run that’s hard to ignore.
The investment doesn’t have to be huge. A solid 20-inch combo bar from a reputable mid-tier brand and a proper relay harness installation will completely transform your night driving capability for well under $200. From there, add pods and rock lights as your budget and trail needs grow.
Take the time to wire it right, aim it properly, and use it legally on public roads — and you’ll have a setup that lasts for years and genuinely earns its spot on the build.

Leave a Reply